Sofa joint repair methods are the techniques used to fix loose, broken, or failing frame connections to restore structural stability and extend a sofa’s usable life. The most common approaches include wood glue with clamping, mechanical fasteners like screws and L-brackets, corner block reinforcement, and dowel replacement. Basic DIY repairs cost $0–$50, putting this well within reach for any homeowner willing to spend an afternoon. This guide covers sofa joint repair methods explained step by step, from diagnosis through long-term maintenance, so you can fix the problem right the first time.
What are the best sofa joint repair methods?
Sofa joint repair, known in the trade as frame joint restoration, covers any technique that re-establishes a solid mechanical connection between two pieces of a sofa’s wooden frame. The right method depends on the joint type, the failure mode, and whether you can apply clamping pressure during the cure. Get that decision wrong and the repair fails within months.
The four core methods every DIYer should know are:
- Wood glue and clamping. The go-to fix for mortise and tenon joints or butt joints where the glue bond has simply dried out. Works best when you can apply firm, even pressure for the full cure time.
- Mechanical fasteners. Screws, L-brackets, and figure-8 fasteners add mechanical reinforcement. Screws aid joints only when surfaces are properly fitted and glued. Fasteners alone cannot fix an open or poorly fitted joint.
- Corner blocks. Triangular wood blocks glued and screwed into the inside corners of the frame. Corner blocks cost roughly $3–$6 each and are one of the most durable reinforcements available for a sofa base.
- Dowel replacement. Old or sheared dowels are drilled out and replaced with larger, epoxy-coated hardwood dowels that bond more aggressively and resist future movement.
Each method has a specific use case. Choosing the wrong one wastes time and materials.
| Method | Best For | Skill Level | Approx. Cost |
|---|---|---|---|
| Wood glue and clamps | Dried-out butt or mortise joints | Beginner | Under $15 |
| Mechanical fasteners | Joints needing added rigidity | Beginner | $5–$20 |
| Corner blocks | Base frame corners | Beginner | $10–$30 |
| Dowel replacement | Sheared or loose dowel joints | Intermediate | $15–$40 |
| Hardwood shims | Gapped mortise and tenon joints | Intermediate | Under $10 |

How do you diagnose sofa joint problems?
Accurate diagnosis is the step most DIYers skip, and it is the reason repairs fail. Replacing foam or webbing before inspecting frame rails is a common mistake. Always confirm the structural load path first.
Follow this sequence to locate the actual problem:
- Remove all cushions. Bare frames reveal movement that padding hides. Set cushions aside and keep the sofa on a hard floor.
- Apply manual pressure. Press down on the arms, push the back forward, and press the deck from side to side. Pressure testing joints locates wobbles and squeaks that point directly to the failing connection.
- Compare both sides. A loose left arm joint becomes obvious when you compare it to the firm right arm. Asymmetry is your clearest diagnostic signal.
- Distinguish the failure type. A squeak usually means a glue failure with surfaces still in contact. A wobble means the joint has opened. A crack in the wood itself is a substrate failure requiring a different fix.
- Check for false positives. Upholstery cover tension can mask structural movement and create the illusion of a solid frame. Photos and precise repair boundaries prevent you from losing critical evidence of the original construction.
Pro Tip: Before touching a single fastener, take photos of every joint from multiple angles. If you partially disassemble the frame and forget how it went together, those photos save you hours.
Once you know exactly which joint is failing and why, you can select the right repair technique with confidence. Skipping this step and guessing at the method is the single biggest reason DIY sofa repairs do not last.
Step-by-step sofa joint repair techniques for diyers
Good preparation separates a lasting repair from a temporary fix. Lay a moving blanket or old sheet under the sofa to protect the upholstery fabric. Work in a space with enough room to maneuver clamps without bumping walls.
Preparing and cleaning the joint
Scrape out any old dried glue from the joint surfaces using a chisel or stiff putty knife. Glue bonds only to clean wood, not to old adhesive residue. Wipe both surfaces with a dry cloth and let them air out for 10 minutes before applying anything new.
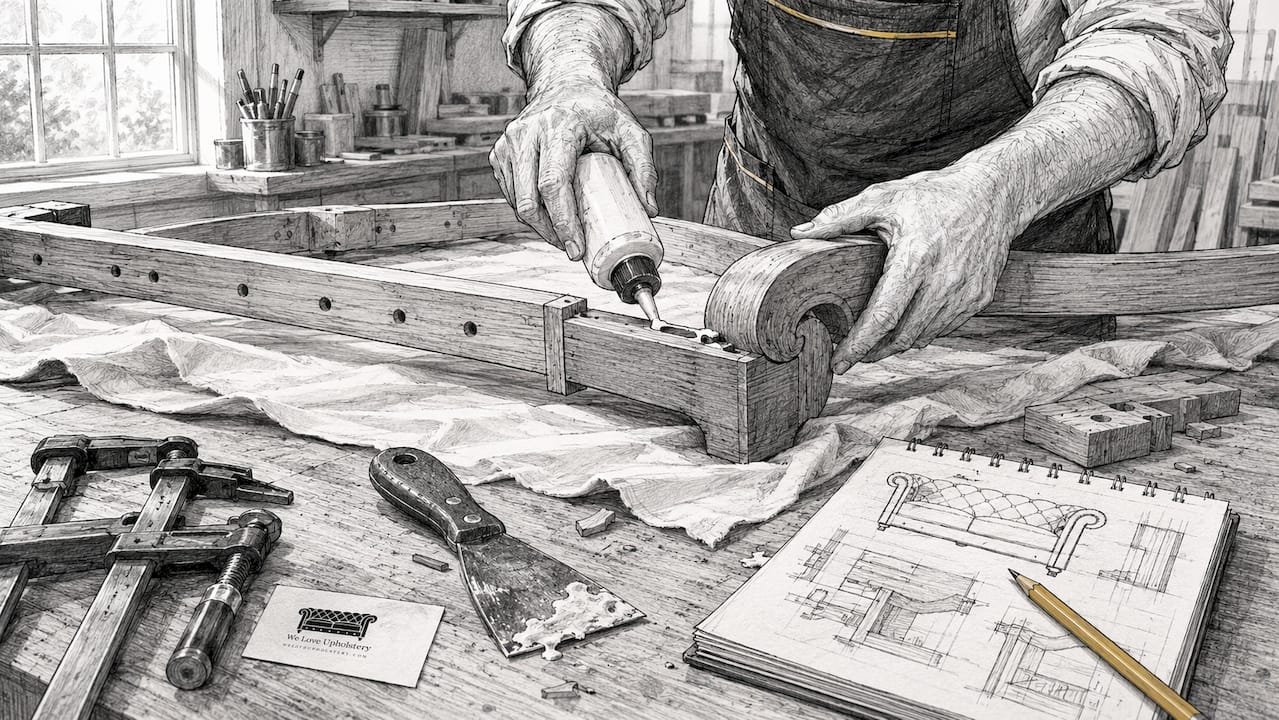
Applying wood glue and clamping
Apply a thin, even coat of PVA wood glue (Titebond II or Titebond III are reliable choices) to both mating surfaces. Press the joint together firmly by hand, then apply clamps. Proper compression during glue cure is what determines whether the repair holds. Clamp pressure should be firm but not so tight that glue squeezes completely out of the joint. Leave clamps in place for a minimum of 2 hours for PVA glue, or up to 24 hours for epoxy.
Fixing stripped screw holes
Stripped screw holes are one of the most common sofa joint issues. The fix is straightforward. Fill the hole with wood glue and a wooden toothpick, let it cure fully, then trim the toothpick flush and re-drive the original screw. The toothpick fills the void and gives the screw threads something solid to grip.
Pro Tip: Use two or three toothpicks packed side by side for larger stripped holes. Snap them off flush after the glue dries, and the repair is nearly invisible.
Replacing dowels and adding shims
For failing dowel joints, drill out the old dowel cleanly and replace it with a slightly larger hardwood dowel coated in two-part epoxy. Epoxy acts as both adhesive and gap filler, which makes it more forgiving than PVA in joints with slight misalignment.
For mortise and tenon joints with visible gaps, hardwood shims sized to species and grain direction restore compression and fit. A shim roughly 1/16 inch thick and 1 inch long, cut from oak or maple to match the original wood, fills the gap without weakening the joint.
Dry-fitting before final assembly
Always dry-fit every joint before applying glue. Check for square using a framing square or by measuring diagonals. A frame that cures out of square is worse than a loose one. Adjust, confirm fit, then glue and clamp.
You can find additional techniques for related repairs in Weloveupholstery’s guide on sofa back support repair, which covers stability issues that often accompany joint failures.
How do you test and maintain repaired sofa joints?
Testing confirms the repair worked. Maintenance prevents the same failure from happening again. Both steps take less than 15 minutes and are worth every second.
Load testing after repair:
- Wait the full cure time before applying any weight. For epoxy, that means 24 hours minimum.
- Sit on the sofa and shift your weight toward the repaired joint. Any movement means the clamp pressure was insufficient or the surfaces were not clean.
- Press the arms and back again using the same manual pressure test from the diagnosis step. A successful repair feels identical to the opposite, unrepaired side.
Common mistakes that reduce repair durability:
- Clamping too loosely, which leaves micro-gaps in the glue line
- Re-assembling upholstery before the glue has fully cured
- Using construction adhesive instead of wood glue or epoxy on wood-to-wood joints
- Ignoring a cracked frame rail and only fixing the joint above it
Routine maintenance tips:
- Check all frame joints every 12 months by repeating the pressure test.
- Tighten any visible screws or L-brackets that have worked loose.
- Keep the sofa away from heating vents. Dry heat causes wood to shrink and glue bonds to fail faster.
- If you notice a loose upholstery seam appearing near a repaired joint, check the frame again. Fabric tension changes often signal renewed frame movement underneath.
When to call a professional: if the frame rail itself is cracked through, if multiple joints have failed simultaneously, or if the wood substrate is soft and punky from moisture damage, a professional furniture restorer will get a better result than any DIY fix.
Key takeaways
The most effective sofa joint repair combines accurate diagnosis, the right adhesive or fastener for the joint type, and firm clamping pressure held for the full cure time.
| Point | Details |
|---|---|
| Diagnose before you repair | Use manual pressure testing and compare both sides to locate the exact failing joint. |
| Match method to failure type | Use wood glue for dried bonds, dowels for sheared pins, and corner blocks for base frame corners. |
| Clamping pressure is non-negotiable | Repairs without proper compression during cure will fail regardless of adhesive quality. |
| Stripped holes need toothpick fills | Pack wood glue and toothpicks into stripped screw holes before re-driving fasteners. |
| Test and maintain annually | Load-test repaired joints and check frame fasteners every 12 months to catch problems early. |
Why patience is the real skill in sofa joint repair
Most DIYers who contact Weloveupholstery after a failed repair share one thing in common: they rushed the clamp time. They applied glue, squeezed the joint by hand, and reassembled the sofa within an hour. The joint held for a week, then failed again under normal use.
The uncomfortable truth is that sofa joint restoration is not technically difficult. The glue, the clamps, and the toothpick trick are all straightforward. What separates a repair that lasts five years from one that lasts five weeks is patience. PVA glue needs at least two hours under pressure. Epoxy needs 24. Those numbers are not suggestions.
The other pitfall I see constantly is skipping the frame inspection before touching the upholstery. Pulling off fabric to fix a joint, then discovering the frame rail underneath is cracked, means you have to remove the fabric twice. Take 10 minutes to press and probe the entire frame before you cut a single staple. You will save yourself hours.
One more thing worth saying directly: most sofas that end up at the curb do not need to be there. A $15 repair with Titebond III and a set of bar clamps can add years to a frame that someone assumed was finished. The value of a proper furniture repair almost always exceeds the cost of the materials. Attempt the repair. The worst outcome is that you learn something.
— Dustin
Ready to repair your sofa? Weloveupholstery has you covered
Knowing the right technique is half the battle. Having the right materials and guides makes the other half much easier.

Weloveupholstery’s DIY repair guides archive covers everything from frame joint fixes to full reupholstery projects, written by practitioners who have done the work themselves. If you need help selecting adhesives, clamps, corner blocks, or upholstery fabrics for the finishing stage, the materials and supplies section walks you through what to buy and why. Stop guessing at the hardware store and start your repair with a clear plan.
FAQ
What is the strongest glue for sofa joint repair?
Titebond III and two-part epoxy are the strongest options for wood frame joints. Epoxy is preferred for dowel replacements and gaps because it fills voids while bonding.
Can you fix a sofa joint without disassembling the frame?
Yes, in many cases. In-place repairs work when you can apply proper clamping pressure during the glue cure. Full disassembly is only necessary when compression cannot be achieved from the outside.
How long do sofa joint repairs last?
A properly glued and clamped joint can last 5–10 years or more. Repairs that skip clamping or use the wrong adhesive typically fail within weeks.
How do you fix a stripped screw hole in a sofa frame?
Pack the hole with wood glue and two or three wooden toothpicks, let the glue cure fully, trim the toothpicks flush, then re-drive the original screw for a solid grip.
When should you replace a sofa instead of repairing it?
Replace the sofa when the frame rail itself is cracked through, the wood substrate is soft from moisture damage, or more than half the joints have failed at once. Single joint failures are almost always worth repairing.