Heads up: this post contains affiliate links. If you buy through them, We Love Upholstery may earn a small commission at no extra cost to you.
You can fix a sagging couch yourself in most cases. The repair path depends on which part is failing: if the cushions are flat, restuff or replace the foam; if the seat deck flexes under your weight, add a plywood support board or repair the springs and webbing; if the frame creaks, cracks, or racks sideways, reinforce joints with glue and corner braces or call a professional. Most cushion and support-board fixes cost under $100 and take a few hours.
Here’s a quick map to the right repair:
- Flat or compressed cushions, firm deck underneath: Restuff with high-density foam or wrap in polyester batting. Time: 1–3 hours. Cost: $25–$80 per cushion.
- Soft or bouncy seat deck, springs popping or webbing loose: Add a plywood support board (fastest fix) or replace sinuous springs and re-tension webbing. Time: 2–4 hours. Cost: a moderate amount for plywood and spring or webbing parts.
- Frame cracks, racks, or joints separate: Inject wood glue, drive screws, add L-brackets or a 2×4 center support. Time: 2–5 hours. Cost: $20–$80 in hardware.
- Severe structural failure (multiple broken welds, cracked seat rail, collapsed frame): Professional repair or replacement. Cost: a significant amount for professional labor.
Foam quality is a major factor in how fast a couch sags. Seat cushions built to ASTM D3574 testing standards use density and ILD (Indentation Load Deflection) to define firmness and durability. Most quality seat foam is reasonably dense and firm, designed for durability. Budget foam typically compresses within a few years of regular use.
Key Takeaways
Diagnosing the correct failure mode before buying materials is the single step that determines whether a couch repair succeeds or wastes money.
| Point | Details |
|---|---|
| Diagnose first | Press the bare seat deck: a firm deck means cushion repair; a soft deck means suspension or frame repair. |
| Cushion fix cost | Full foam replacement runs $25–$80 per cushion using 1.8–2.5 lbs/ft³ foam at ILD 35–45. |
| Plywood support | A 3/4" plywood board cut to inner frame dimensions restores firmness quickly for a modest cost. |
| Frame repair threshold | Loose joints fix with glue and corner braces; a cracked seat rail or racked frame usually needs a professional. |
| Weloveupholstery guides | Step-by-step DIY repair guides and a materials page help you source the right foam, webbing, and springs for a lasting fix. |
Table of Contents
- How do you diagnose what’s causing your couch to sag?
- What tools and materials do you need before you start?
- How do you fix sagging couch cushions step by step?
- How do you repair sagging springs and webbing?
- How do you reinforce or repair a sagging couch frame?
- What are the best quick temporary fixes for a sagging couch?
- When should you replace cushions or hire a professional?
- How do you prevent a couch from sagging again?
- What foam specs should you buy for a lasting repair?
- The repair most homeowners get wrong
- Weloveupholstery has the guides and supplies to get this done right
- Sources
How do you diagnose what’s causing your couch to sag?
Diagnosing before you buy parts saves time and money. The three primary failure modes are compressed cushions, weakened suspension (webbing or sinuous springs), and a failing frame. Each has a different fix and a different cost.
Work through this inspection in order:
- Remove all cushions. Set them aside and look at the seat deck with nothing on it.
- Press the seat deck firmly with both hands. If it feels solid and doesn’t flex, the deck is fine. If it dips or bounces, the suspension is the problem.
- Sit on the bare deck. If you sink noticeably, the springs or webbing have failed. If the deck holds but feels hard, the cushions are the issue.
- Flip the couch or look underneath. Remove the dust cover (usually stapled cambric fabric on the bottom) to see the frame, webbing, and springs directly.
- Inspect the springs. Sinuous (zig-zag) springs should run parallel and be clipped securely at both ends. Look for springs that have popped off their clips, bent sideways, or broken entirely.
- Check the webbing. Woven jute or polypropylene webbing should be taut and intact. Sagging, torn, or detached webbing is a clear failure point.
- Examine the frame. Look for cracks in the seat rail, loose corner blocks, separated joints, or any wood that has split along the grain.
- Squeeze and flex each cushion. A cushion that doesn’t spring back after compression has lost foam density and needs replacement or restuffing.
Pro Tip: Take photos before you disassemble anything. Mark broken springs with a piece of tape and photograph the webbing layout from below. You’ll thank yourself when it’s time to reassemble.
Once you’ve identified the failing system, move directly to the matching repair section below.
What tools and materials do you need before you start?
Gather everything before you begin. Stopping mid-repair to run to the hardware store is how projects stall.
Essential tools
A heavy-duty staple gun (electric or pneumatic, using 3/8" or 1/2" staples) handles most upholstery work. You’ll also need upholstery pliers or a staple remover to pull old staples cleanly, a spring hook or hog-ring pliers for spring work, a drill with screwdriver bits for frame repairs, and a measuring tape. For plywood cuts, a circular saw works well, but most home improvement stores will cut plywood to your dimensions for a small fee, which removes the need for a saw entirely.
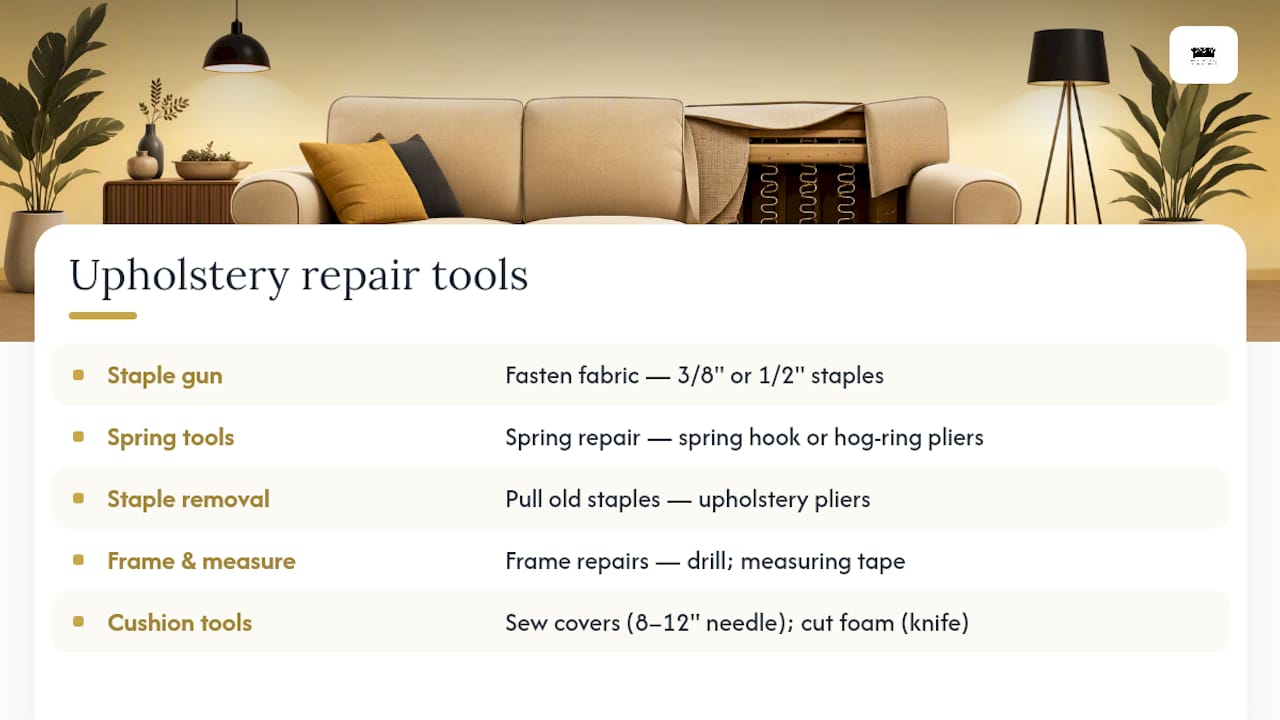
For cushion work, a long upholstery needle (8–12 inches) and heavy thread let you close covers after foam replacement. A bread knife or electric carving knife cuts foam cleanly without tearing.
Check the full upholstery tools checklist for a beginner-friendly breakdown of what each tool does.
Safety gear
Safety glasses are non-negotiable when working with sinuous springs under tension. Springs can snap back with enough force to cause eye injury. Heavy work gloves protect your hands from staple edges and spring clips. If you’re cutting plywood, add hearing protection and a dust mask.
Materials
Plywood: Use 1/2" plywood for lighter-use sofas; go to 3/4" for heavy daily use or heavier occupants. Sand all edges smooth to prevent fabric tears. Cut it to fit the inner frame dimensions, not the cushion size.
Foam: High-density polyurethane foam for seat cores (1.8–2.5 lbs/ft³, ILD 35–45). Memory foam or softer open-cell foam works for toppers. See the foam buying section later in this guide for full specs.
Polyester batting (Dacron): Wraps around the foam core to soften edges and restore a rounded, factory-like cushion profile.
Replacement springs and clips: Sinuous spring kits are available at most upholstery supply retailers in the U.S. Match the gauge and length to your existing springs.
Webbing: Jute webbing (3.5" wide) or polypropylene webbing for replacement. A webbing stretcher tool is worth buying for this job.
Adhesives and fasteners: Contact cement for foam bonding, wood glue for frame joints, and 1.5" wood screws for corner braces.
Browse the materials and supplies page for sourcing guidance on foam, batting, webbing, and springs available in the U.S.
Pro Tip: Ask your local home improvement store (Home Depot, Lowe’s) to cut plywood to size. Bring your measurements written down. It costs a dollar or two per cut and eliminates the biggest source of DIY errors: inaccurate home cuts.
How do you fix sagging couch cushions step by step?
If the seat deck is firm but the cushions are flat, you’re dealing with a cushion issue, not a structural one. That’s good news: cushion repairs are the fastest and least expensive fix.
Step-by-step: full foam replacement
- Unzip or open the cushion cover. Most covers have a hidden zipper along the back seam. If the cover is sewn shut, use a seam ripper along one edge.
- Remove the old foam. Pull it out completely. Note its dimensions before discarding it.
- Measure the cover interior. Measure length, width, and height in inches. Write these down.
- Add 1 inch to each dimension when ordering replacement foam. This oversize rule, recommended by EcoCraftyLiving, gives the foam a snug, factory-like fit inside the cover rather than a loose, shifting feel.
- Cut or order foam to size. Use an electric carving knife for clean cuts. Many online foam suppliers (Foam Factory, Foambymail) cut to custom dimensions.
- Wrap the foam in polyester batting (Dacron). Cut batting to wrap around all sides of the foam like a sandwich. Secure with spray adhesive. This softens the edges and restores the rounded cushion profile.
- Compress the foam slightly to insert it into the cover. A large plastic bag over the foam reduces friction. Once inside, pull the bag out through the zipper opening.
- Close the cover. Zip or hand-stitch the seam closed with an upholstery needle and heavy thread.
For a detailed walkthrough of removing and refitting covers, the T-cushion reupholstery guide covers the full disassembly process.
Quick cushion fixes (when you don’t want to replace foam)
- Polyfill restuffing: Open a seam, add polyester fiberfill around the existing foam core, and resew. Takes 30 minutes. Adds temporary loft but compresses again within months.
- Foam topper insert: Slide a 1"–2" foam sheet under the existing cushion inside the cover. No sewing required if the zipper allows it. Cost: $10–$25.
- Seat cushion topper: Lay a 2"–3" memory foam or high-density topper directly on the seat deck under the cushions. Instant firmness improvement. Cost: $30–$80.
| Method | Foam density / ILD | Difficulty | Est. cost | Est. time |
|---|---|---|---|---|
| Polyfill restuff | N/A (polyester fill) | Beginner | $5–$15 | 30 min |
| Foam topper insert | 1.5–1.8 lbs/ft³, ILD 25–35 | Beginner | $10–$30 | 30 min |
| Full foam replacement | 1.8–2.5 lbs/ft³, ILD 35–45 | Intermediate | $25–$80 per cushion | 1–3 hrs |
| Batting wrap only | N/A (Dacron wrap) | Beginner | $8–$20 | 45 min |
Pro Tip: When cutting replacement foam, go 1 inch larger than your measured dimensions on all sides. Foam that fits too loosely shifts inside the cover and creates lumps. Slightly oversized foam stays put and looks better.
How do you repair sagging springs and webbing?
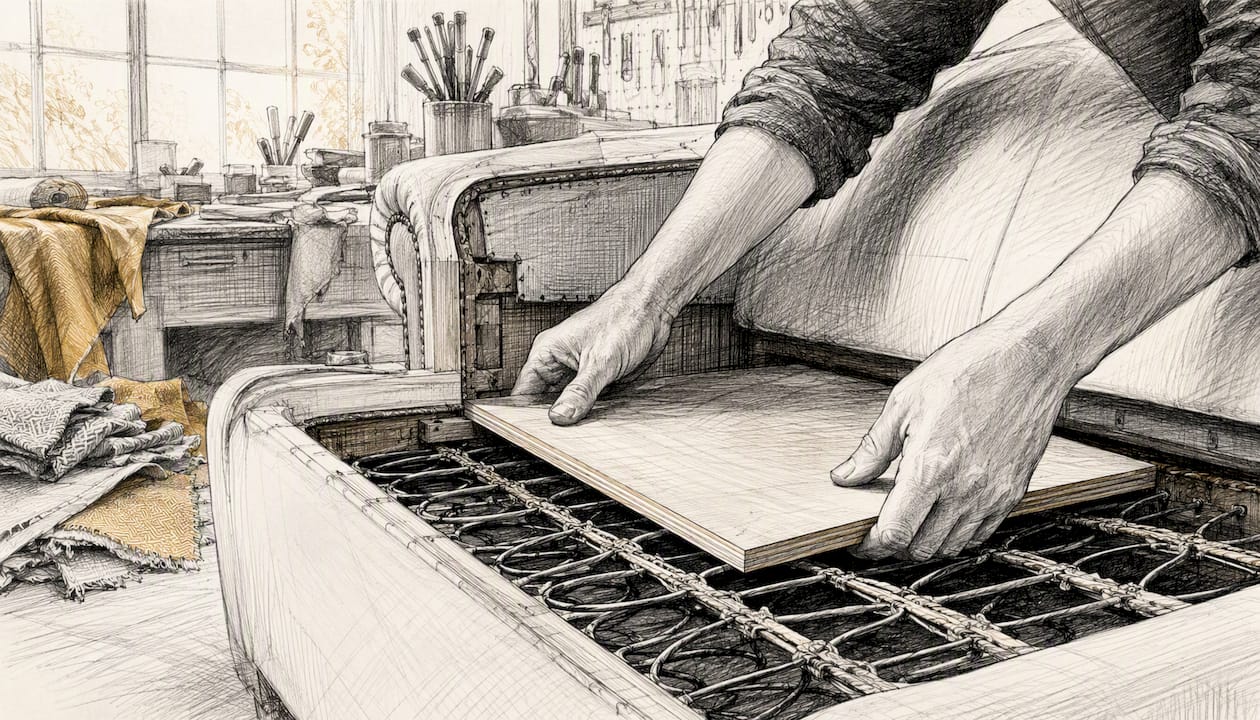
A soft, bouncy seat deck almost always points to suspension failure. Before replacing springs, consider whether a plywood support board solves the problem faster. Adding a rigid support board under the cushions restores firmness without touching the springs at all, and it’s the right call when springs are intact but simply fatigued.
Safety first: Sinuous springs are under significant tension. Always wear safety glasses and gloves when handling them. Never cut a spring while it’s still clipped at both ends.
Option A: Add a plywood support board (fastest fix)
- Remove all cushions and measure the inner frame opening from edge to edge. Measure the frame, not the cushion.
- Cut 3/4" plywood (for heavy use) or 1/2" plywood (for lighter use) to those dimensions. Sand all edges smooth.
- Test-fit the board. It should sit flat on the frame rails without rocking.
- Place a non-slip mat or rubber furniture pad under the board to prevent shifting.
- Replace cushions. Done.
This fix takes under an hour and costs $15–$40 in materials. It’s a permanent solution for many sofas, not just a temporary hack.
Option B: Reattach or replace sinuous springs
Sinuous (zig-zag) springs often pop off their end clips rather than breaking outright. Reattaching popped springs is a straightforward repair if you can access the underside.
- Remove the dust cover by pulling out the staples along the perimeter.
- Identify which springs have popped off their clips or bent out of alignment.
- Use a spring hook or needle-nose pliers to snap the spring back into its clip. If the clip is broken, replace it with a new sinuous spring clip (available in packs at upholstery suppliers).
- For a broken spring, measure its length and gauge, order a matching replacement, and hook it into position using the same clip attachment method.
- Space springs evenly across the frame, typically 4"–6" apart, and connect them laterally with spring twine to prevent spreading.
- Restaple the dust cover when finished.
For a full visual walkthrough, the spring sofa repair guide covers sinuous and coil spring repairs step by step.
Option C: Re-tension or replace woven webbing
- Pull out all staples holding the old webbing to the frame.
- Cut new jute or polypropylene webbing to length, leaving 2" extra on each end for folding.
- Use a webbing stretcher to pull the webbing taut across the frame before stapling. Loose webbing is the most common installation error.
- Fold the end over itself and drive 4–6 staples through both layers into the frame rail.
- Weave the cross-direction webbing over and under the first layer in a basket pattern.
- Staple all ends securely.
Pro Tip: Measure the inner frame opening from rail to rail, not from the outside of the frame. Plywood or webbing cut to the outer frame dimensions won’t fit. This single measurement error accounts for most failed DIY support-board installs.
How do you reinforce or repair a sagging couch frame?
Minor loose joints and small cracks are fixable with wood glue, screws, and corner braces. A cracked seat rail, multiple failed support elements, or a racked (twisted) frame usually means professional repair or replacement is the smarter call.
Step-by-step frame repair
- Access the underside. Remove the dust cover and all cushions. Tip the sofa on its back if needed.
- Identify the problem. Look for separated joints, cracked wood, loose corner blocks, or a frame that racks when you push it diagonally.
- Inject wood glue into loose joints. Use a syringe applicator for tight gaps. Work the joint open slightly if possible, apply glue, then clamp firmly for at least 2 hours.
- Drive screws across the joint. Once the glue sets, add 1.5"–2" wood screws for mechanical reinforcement. Pre-drill to avoid splitting.
- Add L-brackets or corner braces. Metal corner braces ($2–$5 each at hardware stores) reinforce joints that have failed once and are likely to fail again.
- Add a 2×4 center support. If the center of the seat frame flexes, cut a 2×4 to span between the front and rear seat rails and screw it in place. This is especially effective on sofas with a wide seat span.
- Reattach the dust cover with a staple gun when all repairs are complete.
For detailed guidance on joint repair methods, the sofa joint repair guide covers corner blocks, dowels, and rail repairs.
When to call a professional:
- The seat rail is cracked through its full thickness
- Multiple structural elements have failed simultaneously
- The frame is made of metal and a weld has broken
- The sofa racks (twists) even after joint repairs
- Repair costs approach 50% of the sofa’s replacement value
A good upholstery or furniture repair shop charges $150–$400 for frame work, depending on complexity. That’s worth it for a quality sofa; it’s not worth it for a $300 piece.
What are the best quick temporary fixes for a sagging couch?
Sometimes you need the couch to be usable tonight, not after a weekend repair project. These quick fixes restore comfort fast, though most don’t address the underlying cause.
- Plywood insert: Cut a piece of 1/2" plywood to fit the seat area and slide it under the cushions. Immediate firmness improvement. Pros: cheap ($10–$20), works the same day. Cons: can feel hard if cushions are also worn; doesn’t fix broken springs.
- Foam topper layer: Lay a 2"–3" high-density foam sheet or mattress topper on the seat deck. Pros: soft, comfortable, no tools required. Cons: shifts around; doesn’t solve structural problems.
- Stacked flat pillows: Place firm throw pillows under the seat cushions. Pros: zero cost if you have them. Cons: uneven support, compresses quickly, looks odd if cushions sit high.
- Cardboard layer (emergency only): A doubled layer of corrugated cardboard under cushions buys a day or two. Pros: free. Cons: compresses within hours, not a real fix.
Pro Tip: Combine a plywood insert with a foam topper for the best temporary result. The plywood provides structural support; the topper adds comfort. Together they mimic a proper repair well enough to use the sofa comfortably while you source parts.
A temporary fix is perfectly acceptable for a rental property, a short timeline before replacement, or while waiting for foam to arrive. It becomes a problem when it masks a structural issue that’s getting worse, like a cracking frame or a spring that’s about to punch through the fabric.
When should you replace cushions or hire a professional?
The decision comes down to repair cost versus replacement value. A sofa worth $800 or more is almost always worth repairing. A $250 sofa from a discount retailer usually isn’t.
DIY cushion replacement makes financial sense in most cases. Cut-to-size foam typically runs $25–$80 per cushion depending on density and dimensions, which is far less than professional reupholstery or a new sofa. If you have three seat cushions, a full foam replacement costs $75–$240 in materials and a Saturday afternoon.
Hire a professional when:
- The frame has structural damage you’re not comfortable repairing
- The suspension requires complete spring replacement across the full seat width
- The fabric needs replacing along with the structural repairs (combined work is more efficient with a pro)
- You’ve attempted a repair and the problem has returned
- The sofa has sentimental or monetary value that justifies professional-grade work
Questions to ask a repair shop before hiring:
- What’s the warranty on parts and labor?
- What foam density and ILD will you use for replacement cushions?
- Do you use ASTM D3574-tested materials?
- How long will the repair take?
- What’s the estimated lifespan of the repair?
- Can I see examples of similar work?
A reputable shop answers all of these without hesitation. Vague answers on foam specs are a red flag. A good reupholsterer knows their materials.
How do you prevent a couch from sagging again?
The right habits extend a sofa’s life by years. Most sagging is accelerated by predictable, avoidable patterns.
- Rotate cushions every three months. Swap left and right seat cushions, and flip reversible cushions over. This distributes wear evenly across all foam cores.
- Fluff cushions weekly. Shake them, karate-chop the top to redistribute fill, and stand them on edge briefly. This re-aerates the foam and batting, which delays compression.
- Avoid sitting on the armrests or the front edge of the seat. Edge-sitting concentrates weight on the narrowest, least-supported part of the frame and accelerates rail failure.
- Tighten visible screws and bolts once a year. A 10-minute check with a screwdriver prevents loose joints from becoming broken ones.
- Use a support board under heavy-use seats. If one seat position gets used far more than others (the “favorite spot”), a plywood insert under that cushion reduces the load on the springs and webbing beneath it.
- Keep pets off the cushions when possible. Cats and dogs concentrate weight on small areas and their claws accelerate fabric and foam wear.
- Address children’s jumping immediately. Repeated impact loading is the fastest way to break sinuous spring clips and compress foam beyond recovery.
Pro Tip: Set a phone reminder for the first day of each season to rotate your cushions. It takes five minutes and is the single highest-return maintenance habit for sofa longevity. A simple note on your phone calendar is enough.
A sagging sofa often reflects years of uneven use rather than a manufacturing defect. Proper seating posture and ergonomic support matter for your back regardless of whether you’re in an office chair or on a couch. A sofa that sags in the middle forces a posterior pelvic tilt and rounded lower back, which builds up discomfort over time.
What foam specs should you buy for a lasting repair?
Ordering foam by “firm” or “soft” labels alone is a reliable way to get the wrong product. Specify by density (lbs/ft³) and ILD, and look for products tested to ASTM D3574 standards, which measure compression force deflection, tensile strength, and elongation. That’s the industry benchmark for upholstery foam quality.

For seat cores: target a density of 1.8–2.5 lbs/ft³ and an ILD of 35–45. High-density foam at 2.0 lbs/ft³ and ILD 40 is the standard for a firm, durable seat that holds up under daily use. Foam below 1.5 lbs/ft³ density will compress noticeably within one to two years.
For back cushions: density of 1.5–1.8 lbs/ft³ and ILD of 25–35 gives a softer feel appropriate for back support without the firmness needed in a seat core.
For toppers: 1"–2" memory foam or soft open-cell foam at ILD 14–25 adds comfort over a firm base without replacing it.
When measuring for cut-to-size foam, measure the inside of the cushion cover, not the old foam. Old foam has already compressed and will give you dimensions that are too small. Add 1 inch to each dimension for a snug fit.
U.S. suppliers including Foam Factory, Foambymail, and Cushion Source cut foam to custom dimensions and ship nationwide. For a full overview of foam, batting, and webbing options, the upholstery supply materials guide covers what to buy and why.
Pro Tip: Ask your foam supplier for the density and ILD spec sheet before ordering. Any reputable U.S. foam supplier provides this. If they can’t tell you the density of what they’re selling, buy from someone who can.
The repair most homeowners get wrong
Most people who try to fix a sagging couch start with the cushions and stop there. That’s the right call when cushions are genuinely the problem. But a surprising number of sofas sag because the suspension has quietly failed over years, and no amount of new foam fixes a deck that flexes under your weight.
The diagnostic step, pressing the bare seat deck before touching the cushions, is the one most homeowners skip. It takes 30 seconds and tells you everything. A firm deck means you’re buying foam. A soft deck means you’re buying plywood or springs. Skipping that test and buying foam for a suspension problem is how people spend $80 and still have a saggy couch.
The other mistake is underspecifying foam. Ordering “firm foam” without a density or ILD number often gets you 1.2 lbs/ft³ material that compresses within a year. The guides on Weloveupholstery walk through exactly how to read foam specs and what to order for a repair that actually lasts, rather than one that feels good for six months and then starts the cycle again.
Repairs that address the actual failure mode, with the right materials, hold up. The ones that don’t are usually the result of skipping the diagnosis.
Weloveupholstery has the guides and supplies to get this done right
Replacing foam, re-tensioning webbing, and reinforcing a frame are all manageable DIY projects when you have clear instructions and the right materials list. Weloveupholstery’s DIY repair guides walk through each repair type with step-by-step instructions written for homeowners, not professional upholsterers. No assumed knowledge, no skipped steps.

The materials and supplies section covers foam, batting, webbing, springs, and staples with U.S. sourcing guidance so you’re not guessing at what to buy. Some links on Weloveupholstery are affiliate links, which means the site earns a small commission when you purchase through them, at no extra cost to you. That’s how the guides stay free. Browse the repair library and grab the printable inspection checklist to work through your diagnosis before you buy a single part.
Sources
- Plywood Sofa Support: Your DIY Fix & Expert Guide – Meliusly
- How to Fix a Sagging Couch — Livingetc
- How to Fix a Sinking Couch Cushion: Easy Repair Guide – EcoCraftyLiving
- Why does my sofa sag in the middle? How to fix cushions, frame support, and when to replace it