Heads up: this post contains affiliate links. If you buy through them, We Love Upholstery may earn a small commission at no extra cost to you.
A competent DIYer can reupholster a wingback chair in roughly 12–30 hours of hands-on work spread across 2–4 weekends. That’s the honest answer. The project is not fast, but it is absolutely manageable if you follow the right sequence and resist the urge to skip steps.
Budget $300–$800 in materials for a DIY project, depending on fabric quality and whether you need to replace springs or webbing. Hiring a professional typically runs $600–$1,500, according to cost estimates from Abbotts At Home. The DIY route saves real money, but it costs time. Plan accordingly.
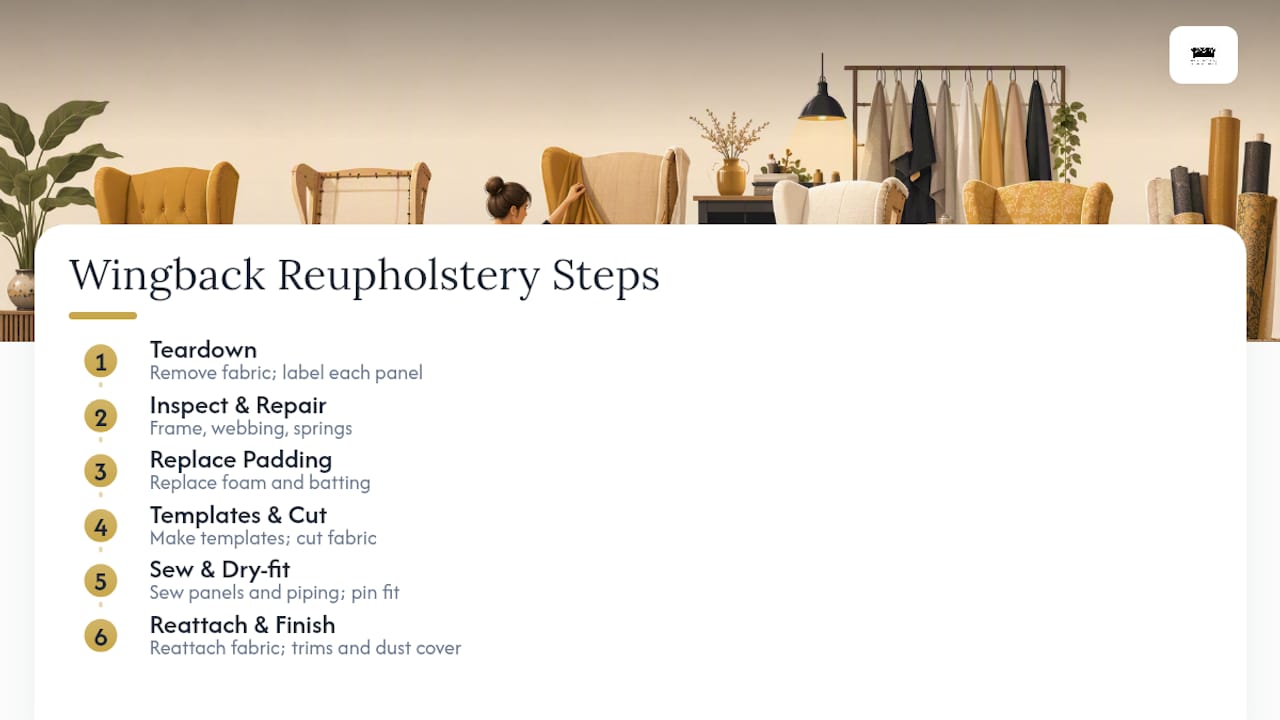
The sequence that works: teardown → inspect and repair frame, webbing, and springs → replace foam and batting → make templates and cut fabric → sew seat, arm, and back panels plus piping → reattach fabric in order → finish trims and dust cover.
Before you buy a single yard of fabric, photograph the chair from every angle, label each panel as you remove it, and measure your yardage needs. Most wingback chairs require 6–8 yards of upholstery fabric, though patterned or napped fabrics push that number higher. Buying short is the most expensive beginner mistake.
Pro Tip: Before you cut a single piece of new fabric, dry-fit your sewn panels over the chair and pin them in place. You’ll catch fit problems in 10 minutes that would take an hour to fix after stapling.
Key Takeaways
Reupholstering a wingback chair takes 12–30 hours of work across 2–4 weekends, costs $300–$800 in DIY materials, and succeeds or fails based on how well you document the teardown and follow the correct reattachment sequence.
| Point | Details |
|---|---|
| Time and cost | Plan 12–30 hours of work and $300–$800 in materials; pros charge $600–$1,500. |
| Fabric yardage | Most wingbacks need 6–8 yards; add extra for patterned or napped fabrics. |
| Correct sequence | Teardown → frame/webbing/spring repair → foam/batting → templates → sew → reattach in order → finish. |
| Template everything | Save old panels as patterns and photograph every teardown stage before cutting new fabric. |
| Weloveupholstery | The DIY Guides archive and Fabric Guide give beginners a structured, supply-linked starting point. |
Table of Contents
- What do you need to reupholster a wingback chair?
- How do you strip and prepare a wingback chair for reupholstery?
- How do you inspect and repair the frame, webbing, and springs?
- How do you choose and install foam and batting?
- How do you create templates, cut fabric, and sew the panels?
- What is the correct sequence for reattaching fabric to a wingback chair?
- How do you reassemble and finish the chair?
- How much does it cost and how long does it take?
- What are the most common DIY mistakes and how do you fix them?
- Pro tips from Weloveupholstery that save time and frustration
- A word on what this project actually feels like
- Weloveupholstery has the guides and supplies to get you started right
- Sources
What do you need to reupholster a wingback chair?
Getting your shopping list right before day one prevents the mid-project hardware store run that derails most DIY upholstery jobs. Here’s everything you’ll need, organized by category.
Fabric and yardage
Plan for 5–7 yards for an average-sized wingback, and 6–8 yards as a safer buffer for most chairs. Add 1–2 extra yards for patterned or directional fabrics where you need to match seams across wings and arms. Solid, non-directional fabrics are the most forgiving for beginners.
For fabric type, look for upholstery-weight material with a double-rub count of at least 15,000 for a chair that sees regular use. Woven fabrics like cotton-linen blends, velvet, and heavy canvas are all workable. Avoid lightweight decorator fabric, which will wear through at stress points within a year. The Weloveupholstery fabric guide breaks down performance characteristics by fabric type if you want a deeper comparison before buying.
Tools checklist
- Staple gun: A pneumatic staple gun is faster and less fatiguing than a manual one. For occasional projects, renting an air compressor and pneumatic stapler from a local tool-rental shop (Home Depot Tool Rental, Sunbelt Rentals) costs roughly $40–$70 per day and is worth every dollar. A heavy-duty manual staple gun like the Arrow T50 works if you’re patient.
- Staples: 3/8" staples for most fabric layers; 1/2" for thicker padding sections.
- Staple remover and needle-nose pliers: You’ll use these constantly during teardown.
- Upholstery scissors: Wiss or Gingher shears cut cleanly through heavy fabric without fraying.
- Webbing stretcher: Non-negotiable if you’re replacing jute webbing.
- Curved upholstery needles: Sizes 5" and 7" cover most hand-stitching needs.
- Heavy-duty sewing machine: A Singer Heavy Duty 4452 or Janome HD3000 handles most seat covers and piping. Thick multi-layer panels or commercial vinyl may require a walking-foot machine or hand work, per guidance from Abbotts At Home.
- Tack strips: Cardboard tack strips for curved edges; metal tack strips for straight runs.
- Hog ring pliers and hog rings: For attaching fabric to spring units.
- Safety gear: Dust mask (N95 rated), safety glasses, and work gloves. Old upholstery can harbor dust, allergens, mold, and decades of debris. Wear the mask from the first staple pull.
Materials checklist
- Upholstery foam (seat: 2"–3" thick, 1.8–2.0 lb density minimum; back: 1"–2" thick)
- Dacron/poly batting (1–2 layers over foam for a rounded, lofted profile)
- Jute webbing or synthetic webbing (for seat deck support)
- Spring twine (for hand-tied coil springs, if applicable)
- Burlap (to cover spring units and support padding)
- Piping/welt cord (3/32" or 1/4" depending on the look you want)
- Cambric dust cover fabric (black, for the underside)
- Spray adhesive (3M Super 77 or equivalent, for bonding foam to decking)
- Fabric glue or hot glue (for trim and finishing details)
- Replacement tack strips and upholstery nails
- Bonded nylon thread (size 69 for most upholstery sewing)
Pro Tip: Buy your foam from a local foam supplier or an online specialty retailer like Foam Factory rather than a craft store. Craft-store foam compresses quickly and loses its shape within months under regular use.
How do you strip and prepare a wingback chair for reupholstery?
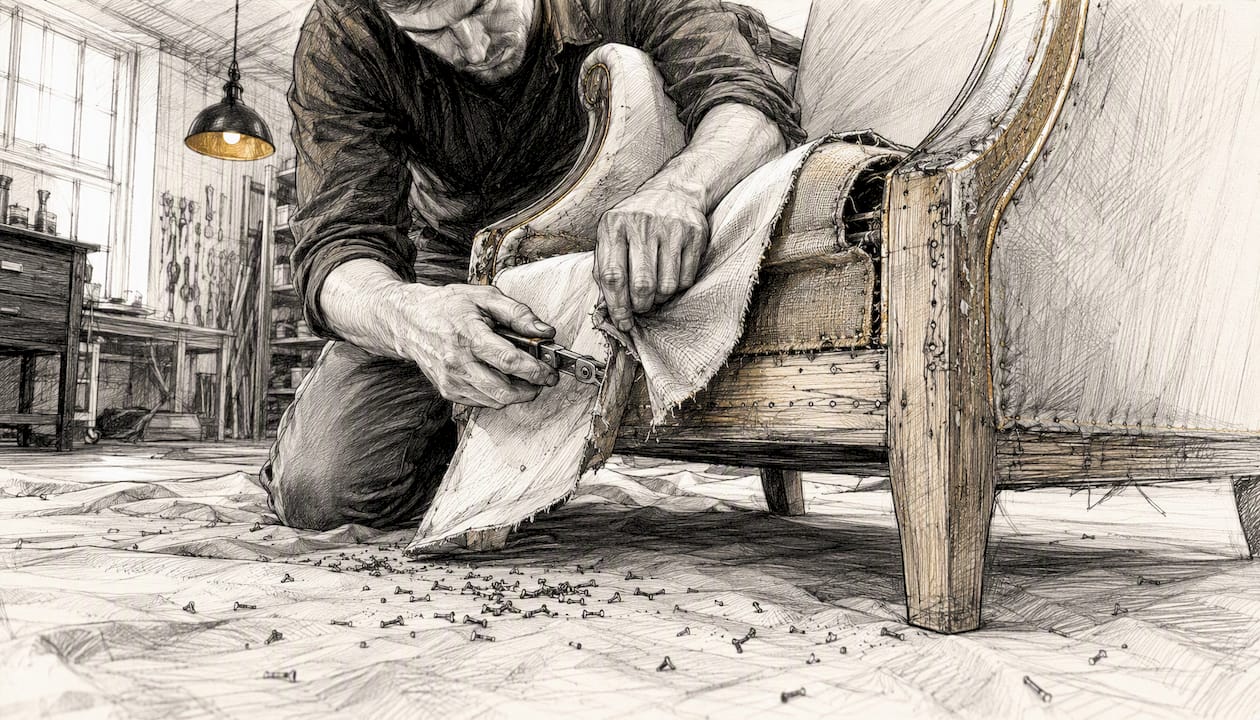
Teardown is where the project either sets you up for success or creates problems you’ll fight for the next 20 hours. The goal is to remove every layer in reverse order of how it was applied, photograph each stage, and preserve the old fabric panels as templates.
Workspace setup
Work on a hard floor, not carpet. Lay down a canvas drop cloth to catch staples (you’ll pull hundreds of them, and bare feet find every one). Set up bright task lighting. Keep three bins nearby: one for salvageable fasteners, one for trash, and one for labeled fabric panels.
Teardown sequence
Start from the bottom and work outward. The general order for most wingback chairs:
- Remove the dust cover (cambric on the underside). Pry staples with your staple remover, working along the grain of the fabric to avoid tearing it.
- Unscrew or pry off the legs and set them aside. Label them if they’re not identical.
- Remove the outside back panel by releasing staples or tack strips along the perimeter.
- Remove the outside arm panels on both sides.
- Remove the inside back panel.
- Remove the inside arm panels and inside wing panels.
- Remove the seat cover last.
As you pull each panel, photograph it flat before setting it aside. Note which direction is “up,” mark the top edge with a Sharpie, and label it clearly (“inside left wing,” “outside back,” etc.). The Thrift Diving tutorial emphasizes saving original panels as templates as the single most reliable way to avoid fit errors during reassembly, and that advice holds.
Removing staples without destroying the template
Use the staple remover to pop the crown of each staple, then grab it with needle-nose pliers and pull straight out. Yanking at an angle tears the fabric. Work slowly on panels you want to preserve intact. If a panel is too damaged to save, trace its shape onto kraft paper before discarding it and add a 1.5" seam allowance around the perimeter.
Pro Tip: Use a muffin tin or labeled zip-lock bags to sort fasteners by location as you remove them. Knowing which screws came from the leg brackets versus the arm brackets saves real time during reassembly.
How do you inspect and repair the frame, webbing, and springs?
This step determines whether the project is worth finishing. A chair with a cracked frame rail or collapsed spring unit needs structural work before any new fabric goes on. Skipping this produces a beautiful-looking chair that fails in six months.
Frame inspection
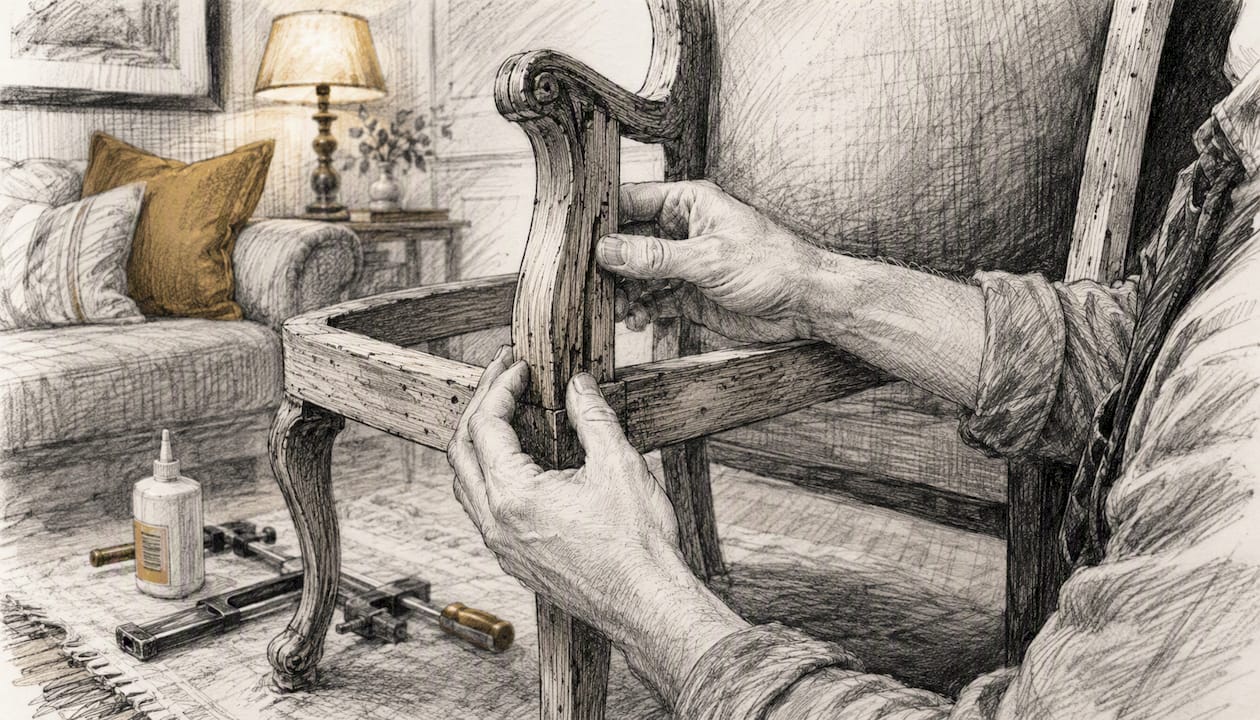
Check every joint by pressing firmly on the arms, back, and seat corners. Any wobble means the joint has failed. Loose joints can often be re-glued with Titebond III or a two-part wood epoxy, then clamped for 24 hours. Cracked frame rails are more serious. A hairline crack can be stabilized with epoxy and a wood screw driven perpendicular to the crack. A fully split rail usually means replacement.
Look for rot, insect damage, or soft spots by pressing a screwdriver tip into the wood. If it sinks in, that section is compromised. A chair with significant rot in load-bearing rails is generally not worth reupholstering unless the frame has sentimental or antique value that justifies the extra repair cost.
Webbing repair
Jute webbing forms the foundation of the seat deck on most traditional wingback chairs. If it sags more than an inch under hand pressure, replace it. Retensioning old webbing rarely holds.
Steps to replace jute webbing:
- Remove all old webbing and staples from the seat rail.
- Cut new jute webbing into strips long enough to span the rail plus 2" on each side for folding.
- Fold the end over 1" and staple it to the front rail with four staples.
- Use a webbing stretcher to pull the strip taut across to the back rail. The webbing should feel firm but not drum-tight.
- Staple the back end, fold, and staple again.
- Repeat for all front-to-back strips, then weave side-to-side strips through them in an over-under pattern.
Jute webbing is traditional and breathable. Synthetic polypropylene webbing is more durable and resists moisture, making it a practical choice for chairs in humid climates or high-traffic rooms.
Seat spring repair
Wingback chairs use either sinuous (S-shaped) springs or hand-tied coil springs. Sinuous springs are simpler: if one is broken or detached, replace it with a matching gauge spring and reattach the clips. If the whole set sags, replace all of them at once.
Hand-tied coil springs are a different matter. Re-tying them with spring twine in an interlocked figure-eight pattern is time-consuming and skill-intensive. As the Thrift Diving tutorial notes, this process is typically taught in multi-session upholstery classes. If your chair has collapsed coil springs and you’ve never tied springs before, budget an extra 4–6 hours and watch several video tutorials before attempting it. Alternatively, replacing a failed coil spring unit with a drop-in sinuous spring kit is a legitimate shortcut for a non-antique chair.
Pro Tip: After re-tying springs, cover them with a layer of burlap and hand-stitch the burlap to the spring tops before adding any padding. This prevents foam from sinking between springs over time.
How do you choose and install foam and batting?
Padding is what separates a chair that looks good from one that feels good. The right foam density and batting combination determines both comfort and how long the chair holds its shape.
Choosing foam
For the seat, use foam with a minimum density of 1.8 lb per cubic foot and a firmness (ILD) rating of 35–45 for a supportive but comfortable feel. A 2"–3" thick seat cushion is standard for most wingback chairs. Going thinner produces a hard, flat seat; going thicker can make the seat height awkward.
For the back and wings, 1"–2" foam at a slightly softer ILD (25–35) works well. The back doesn’t bear the same compressive load as the seat, so you don’t need the same density.
- Cut foam with an electric carving knife or a serrated bread knife. A sharp utility knife works for straight cuts but tends to compress the foam and produce uneven edges.
- Use your old foam pieces as cutting templates when possible.
- Attach foam to the seat deck with spray adhesive (3M Super 77). Spray both surfaces, wait 30 seconds, then press firmly. The bond holds the foam in position while you work.
Batting and specialty fills
Dacron/poly batting goes over the foam to soften edges and create a rounded, lofted profile. Furnivilla’s tutorial recommends layering batting over foam for a smooth, finished look. One layer of 1" batting over the seat and back is usually sufficient. Two layers on the seat gives a plusher feel.
Wrap batting around the foam and secure it with a few staples to the frame, or hand-stitch it to the burlap base. Don’t pull it too tight or you’ll compress the loft you’re trying to create.
For vintage or period chairs, coconut fiber (coir) and cotton felt are traditional fills that sit beneath the foam layer. Coir provides a firm base; cotton felt adds a softer transition. Encase both in a layer of muslin or burlap before adding foam on top. This layering approach is authentic to pre-1950s construction and worth preserving on antique frames.
How do you create templates, cut fabric, and sew the panels?
This is the section where precision pays off. A panel cut 1" too narrow on the inside wing means you’re reordering fabric. A seam that doesn’t align across the arm and back looks amateur from across the room.
Converting old panels to templates
Lay each removed fabric panel flat on kraft paper or pattern paper. If the panel is curved (inside wing panels almost always are), make small relief cuts around the perimeter so it lies flat without distortion. Trace the outline, mark the top edge, and label the piece. Add 1.5"–2" seam allowance on all edges that will be sewn; edges that will be stapled directly to the frame need only 1"–1.5" of tuck allowance.
Cutting patterned or napped fabric
- Lay all templates on the fabric before cutting anything. Arrange them to match the pattern repeat across panels that will sit adjacent on the chair (inside back and outside back, left and right wings).
- For napped fabrics like velvet, all pieces must run in the same direction. Mark the nap direction on each template before cutting.
- When matching a large pattern repeat across the outside back and seat, plan extra yardage and draw a layout diagram first. As noted in Furnivilla’s guide, cutting without a layout diagram on patterned fabric is how you end up needing to reorder from the same dye lot, which is often impossible.
Sewing the panels
Use bonded nylon thread (size 69) for all structural seams. It resists abrasion and won’t break down under UV exposure the way polyester thread can. Set your machine to a stitch length of 3–4mm for most upholstery fabric.
A heavy-duty home machine handles most seat covers and piping. For thick multi-layer sections or commercial vinyl, a walking-foot machine distributes feed evenly and prevents the top layer from creeping ahead of the bottom.
Making piping/welt cord:
- Cut bias strips 1.5" wide from your fabric (or a coordinating fabric for contrast piping).
- Fold the strip around the welt cord and stitch close to the cord using a zipper foot.
- Clip the seam allowance of the piping every 1" when attaching it to curved edges so it lies flat without puckering.
Pro Tip: After sewing a panel, hold it up against the chair section it’s meant to cover before trimming any excess. Pin it in place and check the fit from 5 feet away. Catching a misaligned seam now takes 10 minutes to fix. Catching it after stapling takes an hour.
If you don’t have a sewing machine, a no-sew approach using a staple gun and careful folding produces acceptable results on simpler wingback designs. The finish won’t match fully sewn upholstery, but it’s a legitimate option for a cosmetic refresh on a non-antique chair.
What is the correct sequence for reattaching fabric to a wingback chair?
Sequence matters more on a wingback than on almost any other chair because the wings, arms, and back panels overlap each other. Staple the wrong panel first and you’ll have to remove it to get the next one underneath.
The correct order for most wingback chairs:
- Inside back panel: Center the fabric, pull taut from top to bottom, and staple at the center of each rail first. Work outward from center to corners. Leave the bottom edge loose for now.
- Inside wing panels: Tuck the lower edge of each wing panel behind the inside back. Make relief cuts at the curve where the wing meets the arm so the fabric lies flat. Use a tack strip along the front edge of the wing for a clean, straight line.
- Inside arm panels: Tuck the back edge behind the inside back panel. Pull the front edge around the arm front and staple. Tuck the lower edge into the seat well.
- Seat deck: Pull all tucked edges (inside back, inside arms) down and staple them to the seat rail. Then lay the seat cover over the foam, pull taut in all four directions, and staple. Start at the center of each rail and work toward the corners.
- Outside arm panels: Attach using tack strips along the top and front edges for clean lines. Fold and staple the bottom edge.
- Outside back panel: This is the last major panel. Attach with tack strips along the top and sides, then staple the bottom.
- Welt/piping and trim: Hand-stitch or glue piping along seam lines between outside and inside panels. Apply nailhead trim last, after all fabric is secured.
- Dust cover: Staple cambric to the underside, folding the edges under for a clean finish.
Corners and curves on wings
The inside wing is the hardest part of a wingback reupholstery. The fabric must curve around a convex shape without puckering. Make small V-shaped relief cuts every 1/2"–1" along the curved edge before pulling the fabric around. Pull each section taut individually and staple before moving to the next. Use a tack strip along the front wing edge to get a crisp, straight line where the inside and outside wing panels meet.
Staple spacing: 1/2"–3/4" apart on straight runs, 1/4"–3/8" apart on curves. Closer spacing on curves prevents the small puckers that show through fabric.
Pro Tip: On the outside back panel, use a cardboard tack strip along the top edge and hand-stitch the panel to the inside back along the sides using a curved needle and a slip stitch. This gives a cleaner finish than stapling through to the outside.
How do you reassemble and finish the chair?
The final assembly steps are where the project goes from “almost done” to actually done. Don’t rush them.
Reattaching legs and wood trim
- Screw legs back in firmly. If a leg wobbles, add a small amount of Titebond III to the threads before screwing in.
- Check all four legs on a flat surface. If the chair rocks, one leg is shorter or the floor is uneven. Add a furniture leg cap or felt pad to compensate.
- Reattach any decorative wood trim with the original screws or small finish nails. Pre-drill if the wood is old and prone to splitting.
Cleaning and refinishing exposed wood
Light scuffs and scratches on exposed wood (arms, legs, back rails) respond well to a wipe-on finish like Minwax Wipe-On Poly or Howard Feed-N-Wax. For deeper scratches, lightly sand with 220-grit sandpaper, wipe clean, and apply a matching stain before finishing.
Full refinishing (stripping, sanding, restaining) is worth doing if the wood is badly damaged or if you’re changing the color to match new fabric. Otherwise, a touch-up is faster and looks fine on a chair that will be used, not displayed.
Seat cushion covers
- For a removable seat cushion, sew a cover with a zipper closure along the back edge for easy removal and washing.
- An envelope closure (overlapping fabric at the back) is simpler to sew and works well for cushions that won’t need frequent washing.
- If the chair has tufting or buttons, sew buttons onto a backing button and pull the thread through the foam and fabric using a long upholstery needle. Tie off firmly at the back.
Dust cover and final inspection
- Cut cambric to the underside dimensions of the chair, fold all edges under 1/2", and staple every 2"–3" around the perimeter.
- Run your hand across every panel and press lightly. Any staple that didn’t seat fully will catch your palm. Drive it in with a mallet or pull and replace it.
- Check for asymmetry by standing 6 feet back and looking at the chair straight-on. Uneven tension usually shows as a diagonal pull in the fabric.
Fabric care after finishing: Vacuum upholstery fabric weekly with a brush attachment. For spills, blot immediately with a clean cloth. Check the fabric’s care code (W = water-based cleaner, S = solvent-based, WS = either, X = vacuum only) and keep a matching fabric swatch for future repairs.
How much does it cost and how long does it take?
Here’s an honest breakdown, because the numbers vary more than most tutorials admit.
The $300–$800 DIY material range is wide because fabric is the swing factor. A basic cotton-linen blend at $15–$25 per yard keeps you near the low end. A designer velvet at $60+ per yard pushes you past $500 in fabric alone before you buy a single staple.
When to hire a pro instead
- The frame has significant rot or multiple broken joints that need a woodworker’s attention.
- The chair has hand-tied coil springs and you’ve never tied springs before.
- The chair is a valuable antique where a DIY mistake would reduce its worth.
- You have a hard deadline (a pro can typically complete the job in 1–2 weeks).
- You’ve priced the materials and the DIY cost is within $200 of the professional quote.
How to get a reliable pro quote: Ask for a written breakdown of labor, materials, and expected timeframe. A reputable upholsterer will specify the fabric grade, foam density, and whether webbing and spring work are included. Vague quotes (“starting at $X”) usually mean the final bill will be higher.
For a broader framework on deciding whether a furniture repair is worth the investment at all, the Weloveupholstery repair-value guide walks through the cost-versus-replacement math in detail.
What are the most common DIY mistakes and how do you fix them?
Most problems on a first wingback project fall into a short list. The good news: most are fixable without undoing the entire chair.
- Wrinkled or puckered fabric on flat panels: Release the staples on the affected edge, re-pull the fabric taut from the opposite side, and re-staple. Work from center outward. This takes 15 minutes and fixes 90% of tension problems.
- Misaligned pattern across panels: If you catch it before the panel is fully stapled, release and realign. If it’s fully stapled, weigh the visual impact. A slight mismatch on the outside arm is less noticeable than one on the inside back. Redo only if the mismatch is visible from a normal seating distance.
- Loose staples that pop up: Drive them in with a mallet. If they won’t seat, pull them and replace with a longer staple (upgrade from 3/8" to 1/2").
- Lumpy padding: Add a thin layer of Dacron batting over the problem area and smooth it before re-covering. You don’t need to remove the fabric if the lump is minor.
- Puckering at wing curves: Make additional relief cuts in the fabric, closer together, and re-staple. The fix is almost always more cuts, not tighter pulling.
- Visible staples on outside panels: Use a tack strip instead of exposed staples on outside panels. If staples are already in, cover them with gimp trim or welt cord glued along the edge.
Priority order for fixes: Structural issues first (loose joints, failed webbing). Then padding (lumps, compression). Then fabric tension (wrinkles, puckers). Then trims (exposed staples, misaligned welt). Never try to fix a trim problem when the underlying padding is wrong.
Pro tips from Weloveupholstery that save time and frustration
These are the things that separate a project that looks handmade from one that looks professional.
- Template everything before cutting. Lay all old panels on your new fabric and trace them before cutting a single piece. This one habit prevents the most expensive mistake in DIY upholstery.
- Photograph every stage of teardown. You will forget how the inside wing tucked behind the arm. The photo takes two seconds; reconstructing the sequence from memory takes 30 minutes.
- Buy tools once, buy them right. A quality pneumatic staple gun (Arrow PT50, Bostitch BT50) is worth the investment if you plan more than one upholstery project. Rent for a single project; buy for two or more.
- Rent, don’t buy, a webbing stretcher for a one-time project. Most tool-rental shops carry them.
- Use a tack strip on every outside panel. It produces a cleaner edge than stapling through the face of the fabric and is faster to redo if you need to adjust.
- Sew piping before you cut the main panels. Piping takes longer than most beginners expect, and running out of bias-cut strips mid-project means re-cutting from your remaining fabric.
- For the inside wing, less tension is more. Pulling the fabric too tight on a convex wing surface creates diagonal stress lines. Pull just enough to remove slack, then staple.
The complete DIY tools checklist at Weloveupholstery lists recommended brands and budget alternatives for every tool mentioned here, with notes on what to rent versus buy for a homeowner doing occasional projects.
Pro Tip: For a clean inside wing without puckers, use a tack strip along the front edge of the wing and hand-stitch the inside wing panel to the inside back panel along the seam line using a curved needle and a ladder stitch. The combination of tack strip and hand stitching holds the curve without pulling.
A word on what this project actually feels like
Reupholstering a wingback chair is one of those projects where the first two hours feel discouraging and the last two hours feel genuinely satisfying. The teardown is messy, the structural inspection sometimes reveals problems you weren’t expecting, and the inside wings will probably frustrate you the first time.
If I were advising a beginner on where to start, I’d say: practice on a dining chair seat first. It’s the same core skill set (stapling, tension, corners) without the complexity of wings, arms, and a back. Once you’ve done two or three dining chair seats, a wingback feels like a natural next step rather than a leap.
The chairs worth starting with are mid-century wingbacks with simple lines, no tufting, and sinuous springs. They’re structurally forgiving, widely available at thrift stores for $20–$80, and the results are dramatic enough to be genuinely motivating. Avoid starting with a heavily carved Victorian wingback or anything with hand-tied springs and deep button tufting. Those are second or third projects.
Patience is the real skill here. The readers who finish with a chair they’re proud of are the ones who slow down at the corners, dry-fit panels before stapling, and don’t try to finish in a single weekend.
Weloveupholstery has the guides and supplies to get you started right
Skipping the research phase is where most DIY wingback projects go sideways. Weloveupholstery cuts that learning curve with practical, practitioner-written guides built specifically for homeowners doing this for the first or second time.

The Upholstery Fabric Guide gives you a clear breakdown of fabric types, durability ratings, and yardage planning so you don’t overbuy or end up with fabric that wears out in a year. The DIY Guides archive covers the full range of upholstery projects, from dining chair seats to full sofa reupholstery, with step-by-step photos and curated supply recommendations. For everything from foam and batting to webbing and staples, the materials and supplies section points you to the right products without the guesswork. Start with the fabric guide, build your shopping list, and you’ll walk into this project with a plan that actually holds up.
Sources
These are the most practical references used to build this guide, organized by what they do best.
- How to Reupholster a Wingback Chair | 7 Easy Steps (2026)
- How to Reupholster a Wingback Chair: A Step-by-Step Tutorial
- How to Reupholster a Wingback Chair: Best Tips & Easy Steps – Abbotts At Home
- How To Reupholster A Wingback Chair Without Sewing – Four Generations One Roof Blog