Heads up: this post contains affiliate links. If you buy through them, We Love Upholstery may earn a small commission at no extra cost to you.
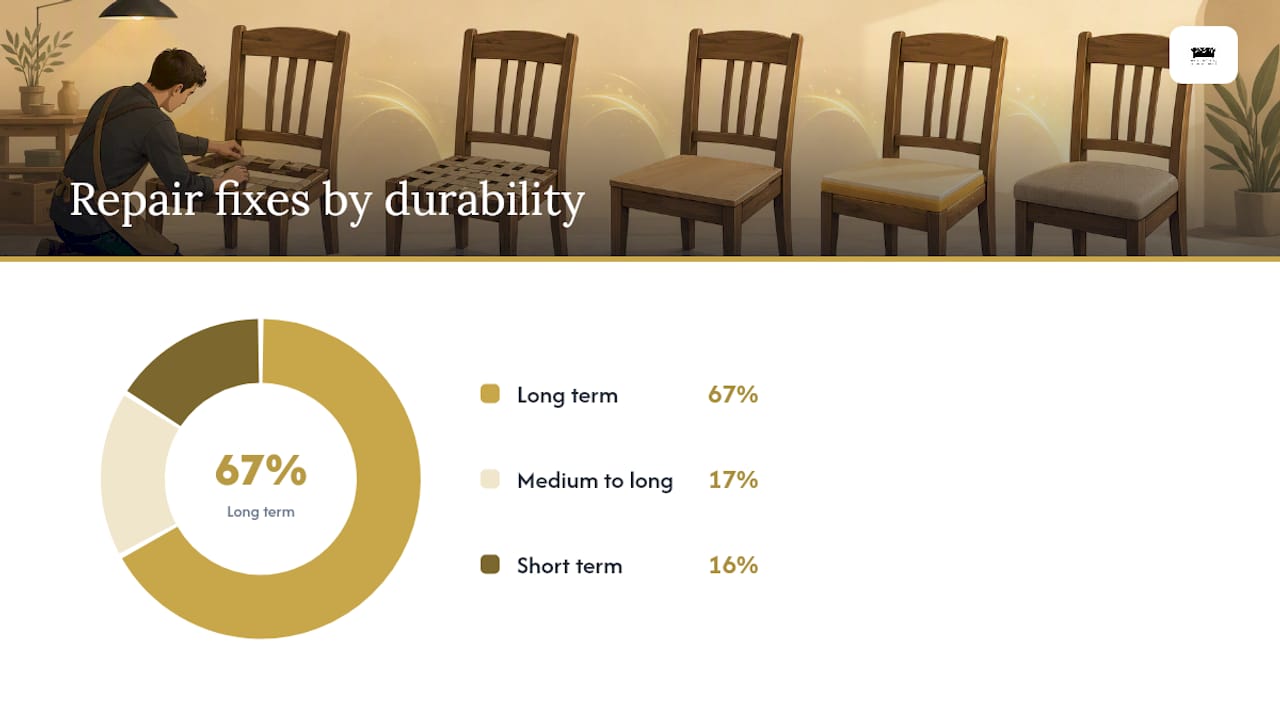
For a sagging upholstered seat, replace the webbing in a cross-weave using high-tensile nylon or polyester. It’s the most durable fix available to a home repairer, and it addresses the actual cause of sag rather than masking it. A wobbly frame needs glue and mechanical reinforcement (dowels, corner blocks, or L-brackets) before anything else. A split wooden seat wants dowel joinery plus metal mending plates. Broken or flattened springs call for spring replacement, not more foam. Thin, compressed foam just needs new foam and batting, once the structure underneath is sound.
Here’s the short version of why: webbing fails first because it’s the layer doing the most work under repeated weight, and nylon or polyester holds tension longer than natural jute because it resists moisture and stretch better over time. Frame joints loosen from years of racking stress, and glue alone won’t outlast the next dinner party without a dowel or bracket backing it up. Springs, once they lose temper or snap, don’t recover; foam just distributes pressure on top of whatever support system is actually holding you up.
| Symptom | Best DIY fix | Expected durability |
|---|---|---|
| Sagging upholstered seat | Replace webbing (cross-weave, nylon or polyester) | Long term, often 10+ years |
| Wobbly frame or loose joints | Glue, clamp, dowel, add corner blocks | Long term if done correctly |
| Split or cracked wooden seat | Dowel joinery plus mending plates | Long term |
| Broken or flattened springs | Replace spring system | Long term |
| Thin or worn foam, seat still firm underneath | Replace foam and batting | Medium to long term |
| Need a fix tonight, diagnosis unclear | Plywood support board or foam topper | Short term only |
If you’re not sure which of these applies to your chair, the next section walks through a five-minute inspection that tells you exactly what failed.
Key Takeaways
Matching the repair to the actual failed component, frame, webbing, springs, or foam, determines whether a chair seat repair lasts years or fails again within months.
| Point | Details |
|---|---|
| Diagnose before you fix | Press-test the seat and check underneath before choosing a repair method. |
| Frame comes first | Stabilize loose joints with glue and mechanical fasteners before any upholstery work. |
| Webbing needs the right material | High-tensile nylon or polyester in a cross-weave outlasts jute for long-term support. |
| Quick fixes are temporary | Plywood boards and foam toppers buy time but don’t replace structural repair. |
| Weloveupholstery has the detailed guides | Step-by-step tutorials for webbing, frame joints, and foam replacement live on the site’s DIY guides archive. |
Table of Contents
- How to Diagnose What’s Actually Wrong With Your Chair Seat
- Tools and Materials for Every Chair Seat Reinforcement
- Quick Temporary Fixes for a Sagging or Damaged Seat
- Reinforcing a Weak or Wobbly Chair Frame
- How to Replace Chair Seat Webbing for Long-Term Support
- Repairing or Replacing Broken and Flattened Chair Springs
- Fixing a Cracked or Split Wooden Chair Seat
- Reupholstering and Replacing Foam to Finish the Job
- How Much Time and Money Should You Budget?
- When to Call a Professional Instead of DIY
- Practitioner Pointers From Hands-On Chair Repairs
- Get the Full Walkthrough and Supplies From Weloveupholstery
- Frequently Asked Questions
- Sources
How to Diagnose What’s Actually Wrong With Your Chair Seat
Faster fixes fail when you skip diagnosis. Slap a foam topper on a chair with snapped springs, and you’ll be back to square one in a month, because you treated the symptom and ignored the mechanism underneath it.
Start by flipping the chair over or removing the seat if it’s a drop-in dining chair seat (most are held by four screws through the underside). With the seat exposed, run a simple press test: push down firmly at the center of the seat while watching how the rails respond. If the rails flex or separate slightly, you’re looking at a frame or joint problem, not just a sagging cushion. If the seat gives locally, right where you pressed, but the surrounding area stays firm, that’s usually a spring or webbing failure isolated to one section.
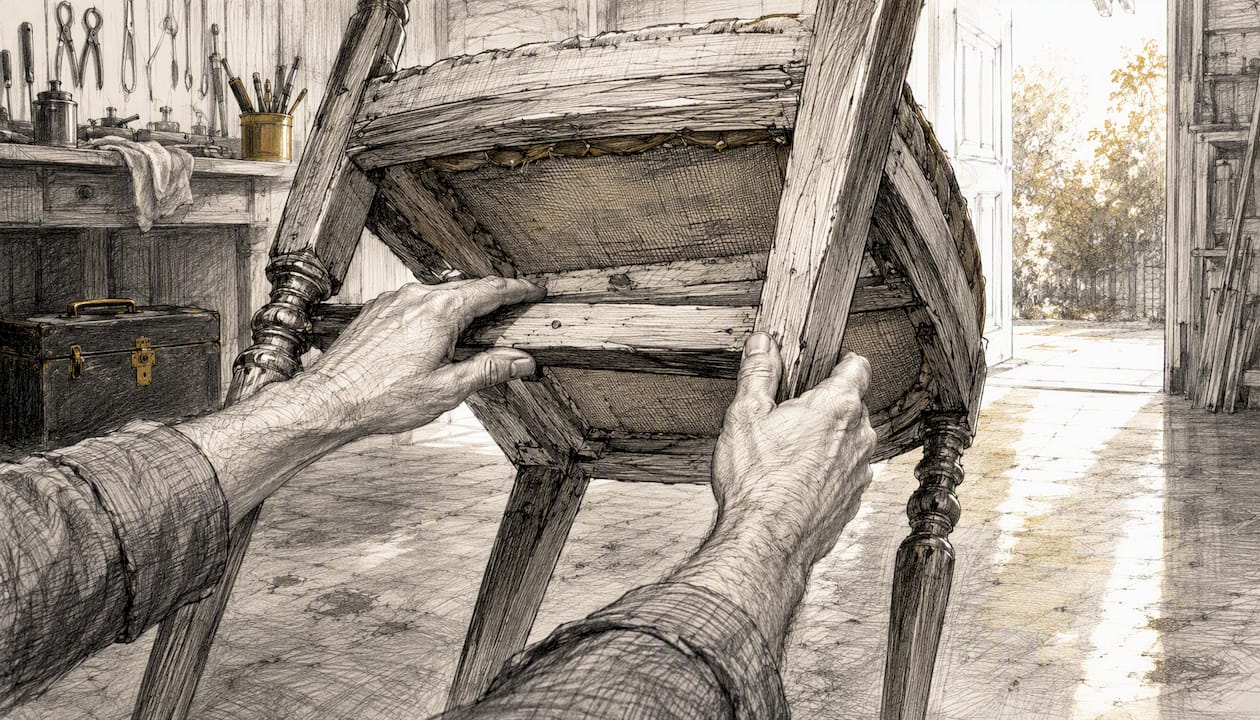
Listen while you press. A hollow, loose sound under your palm often means webbing has detached from its staples. A metallic ping or a springy give that doesn’t rebound evenly points to broken sinuous or coil springs.
Pull back the dust cover on the underside (it’s usually black cambric fabric stapled around the perimeter) and look at the webbing directly. Sagging, torn, or stretched-out strips with visible gaps are done. Jute webbing that’s turned brittle and started to fray is a clear sign it’s decades old and due for replacement. If you see coil springs, check whether they’re still uniformly tensioned; a spring that’s noticeably shorter or looser than its neighbors has lost its temper and won’t hold weight the way it used to.
One distinction matters here: a loose or wrinkled fabric cover is cosmetic. It’s annoying, but it’s not structural. Don’t confuse a seat that looks tired with one that’s actually failing underneath. You can have gorgeous, taut fabric over a webbing system that’s about to give out, and you can have ugly, faded fabric over a frame that’s perfectly solid. Check the mechanism, not the surface.
Tools and Materials for Every Chair Seat Reinforcement
Every DIYer working on chair seats should own a staple gun, a box of 1/4 inch to 3/8 inch staples, wood glue, a couple of bar clamps, a screwdriver set, a tape measure, and a utility knife. That’s the baseline kit. Everything past that depends on which repair route you’re taking.
For a temporary support fix: a piece of 1/4 inch to 1/2 inch plywood or hardboard cut to seat size, plus screws to anchor it.
For frame and joint repair: wood glue (something like Titebond III is a common choice for its water resistance and long open time), clamps, wood dowels, and metal mending plates or L-brackets.
For webbing replacement: high-tensile nylon or polyester webbing, a gooseneck webbing stretcher, and heavier duty 3/8 inch staples that can grip through multiple webbing layers.
For spring repair: replacement sinuous springs or coil springs sized to match your chair, hog rings and a hog ring pliers if you’re securing coil springs to webbing.
For a wooden seat repair: 1/8 inch dowel rods, a doweling jig for accurate hole placement, and metal mending plates.
For a full reupholstery pass: upholstery foam in the appropriate density, Dacron batting, your fabric of choice, and upholstery tacks or finishing nails for any exposed trim.
| Repair route | Must-have items | Skill level |
|---|---|---|
| Temporary support board | Plywood, screws, tape measure | Beginner |
| Frame and joint repair | Wood glue, clamps, dowels, mending plates | Intermediate |
| Webbing replacement | Nylon/polyester webbing, stretcher, staple gun | Intermediate |
| Spring replacement | Replacement springs, hog rings, pliers | Intermediate to advanced |
| Wooden seat repair | Dowels, doweling jig, mending plates | Intermediate |
| Full reupholstery | Foam, batting, fabric, staples/tacks | Beginner to intermediate |
If you’re missing basics, Weloveupholstery’s upholstery tools checklist walks through what to buy first versus what you can improvise.
Quick Temporary Fixes for a Sagging or Damaged Seat
A plywood support board suits a seat with damaged or missing webbing where you need it usable today, not a chair with a cracked frame. Screws and glue tighten a wobbly joint temporarily, but they’re not a permanent structural fix without dowels backing them up.
For the plywood route, measure your seat opening and cut a piece of 1/4 inch to 1/2 inch plywood or underlayment to fit snugly inside the frame, resting on the rails rather than dropping through them. Drop it in place, add a foam topper on top if the original padding is compressed, and you’ve got a stable sitting surface in under 30 minutes. This costs somewhere in the range of $10 to $25 depending on plywood scraps you might already have, and it typically lasts weeks to a few months as a bridge until you tackle webbing or springs properly. One home-repair walkthrough on fixing sagging dining chairs describes exactly this approach: stripping old staple layers and dropping in a replacement plywood platform before recovering the seat.
Tightening loose screws is even faster. Remove each screw, check the hole for stripped wood, and if the hole is worn, back-fill it with wood glue and toothpicks or a matchstick before rescrewing. That takes five to ten minutes per joint and costs next to nothing.
Adding a corner block to a wobbly frame joint (a triangular wood block glued and screwed into the inside corner where two rails meet) takes fifteen to twenty minutes per corner and genuinely extends the life of the joint, not just papers over it.
None of these are load-bearing forever. Test-sit the chair carefully after any quick fix, easing your weight down rather than dropping into it, and if you feel any give or hear cracking, stop and move to a structural repair instead.
Reinforcing a Weak or Wobbly Chair Frame
Stabilize the frame first. A strong frame is the foundation everything else sits on, and there’s no point installing fresh webbing or new foam over rails that flex under load.
- Remove the seat from the frame, or flip the chair upside down if the seat is integrated.
- Test every joint by hand, gently rocking each rail connection to feel for movement or hearing a creak.
- For any joint with play, pull it apart slightly (or as far as it’ll go without forcing it) and apply wood glue generously to both mating surfaces.
- Clamp the joint tight and let it cure for at least eight hours, ideally overnight, before handling the chair again.
- Once dry, add a corner block or L-bracket across the inside corner for joints that see the most stress, screwing rather than just gluing it in place.
- For a joint that’s split rather than just loose, drill and insert a dowel across the break for mechanical strength, then glue and clamp as above.
- Fasten with screws through pilot holes wherever you’re adding brackets, since screwing into bare wood without a pilot hole often splits older, drier stock.
Pro Tip: Glue alone creaks back open within months on a chair that gets regular use. Pair every glued joint with a mechanical fastener, a dowel, a screw, or a bracket, so the wood fibers aren’t doing all the holding by themselves.
Before you fasten anything, check the wood condition. Soft, punky wood around a screw hole won’t hold a fastener no matter how tight you drive it; treat it with a liquid wood hardener first, or drill it out and fill with a wood filler or dowel plug, then redrill once cured.
How to Replace Chair Seat Webbing for Long-Term Support
Replacing degraded webbing with high-tensile nylon or polyester in a cross-weave pattern gives the most consistent long-term support for the majority of upholstered dining and occasional chairs. This is the repair that actually restores the suspension system your seat cushion sits on, rather than just topping off what’s already failing underneath.
Nylon and polyester webbing beat traditional jute or cotton webbing on two counts: they stretch less over time under sustained load, and they resist moisture instead of absorbing it and rotting from the inside. Professionals lean toward synthetic webbing specifically because it holds its tension for the long haul, where jute tends to stretch out within a few years of regular use.
The workflow itself has a logical order. Pull off the dust cover, remove the old webbing strip by strip, and pull every old staple with a staple remover or flathead screwdriver so nothing’s left proud to interfere with the new strips. Vacuum the frame and check the rails for splinters or rough edges that could snag or fray new webbing.
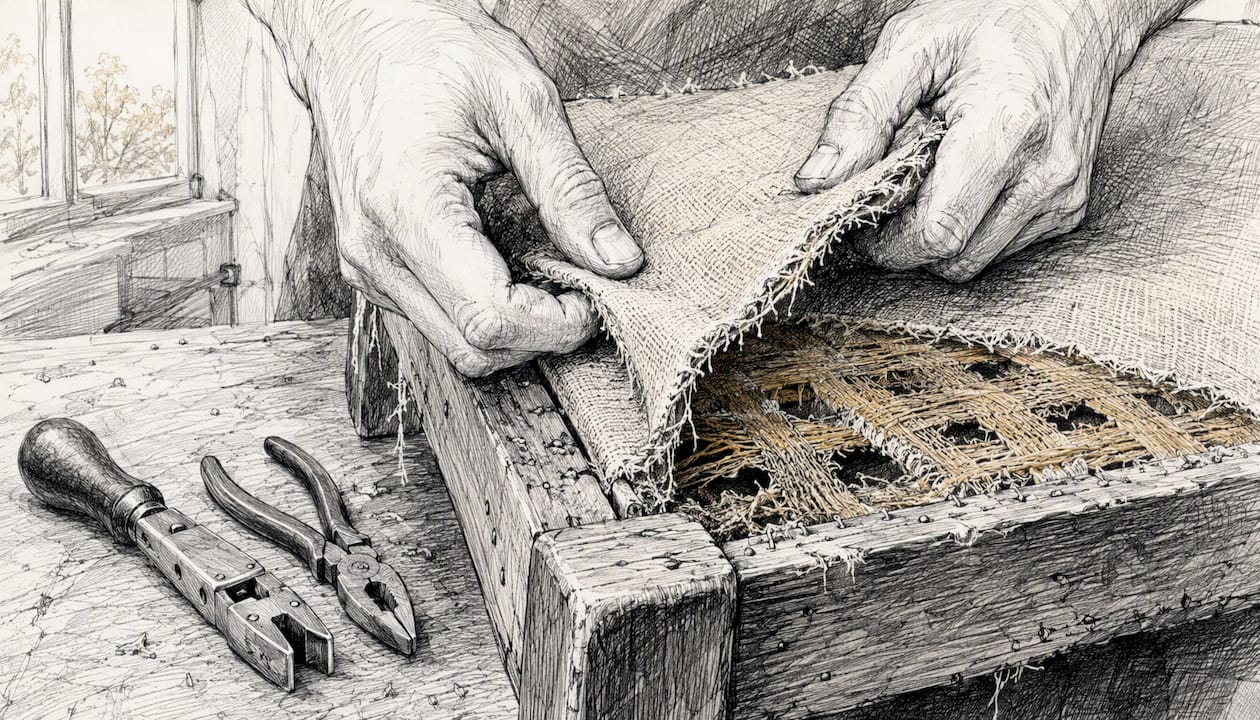
Measure your seat opening and cut webbing strips about 2 inches longer than the span on each side, giving yourself enough spare length to fold back and double-staple each end. Attach the first vertical strip at the center of the seat, then work outward toward each side, alternating left and right so tension stays balanced across the frame. Use a gooseneck stretcher to pull each strip tight before stapling, since hand-tensioning alone rarely gets you the 10 to 15 percent stretch that professional installs target. Once the verticals are set, weave the horizontal strips over and under them in a basket pattern, stretching and stapling each in turn.
Space your strips evenly apart to maintain strong support and prevent sagging. Fold each strip’s end back over itself before the final staples go in; that double layer at the staple line is what keeps the strip from tearing free under load, and it’s the single most common shortcut people skip when they’re rushing.
Pro Tip: There’s a real tension tradeoff here. Too little stretch and the seat sags again within a year. Too much, and you risk pulling an old, dried-out rail apart or splitting the wood where the staples bite. On a chair frame that’s more than 30 or 40 years old, tension in stages, checking the rail for stress after each strip, rather than cranking every strip to maximum on the first pass.
Repairing or Replacing Broken and Flattened Chair Springs
If your springs are broken or flattened, replace the spring system. Foam alone can’t restore the firmness a properly tensioned spring set provides, no matter how dense the foam is.
Chairs typically use one of two spring types. Sinuous springs (also called zig-zag springs) run front to back in continuous S-shaped curves, usually visible as long metal strips when you look underneath. Coil springs sit upright, individually tied or clipped to webbing below and to each other with twine or clips above; you’ll mostly find these in older or higher-end upholstered seating rather than basic dining chairs.
- Flip the chair and locate every spring, noting whether they’re sinuous strips or coil springs.
- Check each one by hand, looking for broken ends, visibly flattened coils, or springs that have slipped loose from their anchor clips.
- If a spring has simply worked loose from its clip but isn’t broken, re-hook and re-tension it, and check the clip itself for wear.
- If a spring is broken or permanently deformed, unhook it carefully and remove it, noting exactly how it was anchored before you pull it free.
- Order a replacement spring matched in length, gauge, and curve to the one you removed; hardware and upholstery supply stores carry standard sizes for both sinuous and coil springs.
- Install the new spring using the same anchor points and clips, checking that tension across all springs feels roughly even by hand before you close the seat back up.
- For older, more fragile frames where springs keep failing or the rails can’t take spring tension anymore, remove the spring system entirely and substitute a properly tensioned webbing base instead.
Working around springs under tension carries real risk. Wear eye protection, unhook one spring at a time rather than releasing several at once, and keep your anchor points secure before you start cutting anything loose. If a spring system involves tied coil springs with twine lacing throughout, that’s a job where a lot of DIYers underestimate the time and precision involved, and it’s often the point where calling a professional upholsterer makes more sense than pushing through solo.
Fixing a Cracked or Split Wooden Chair Seat
Dowel the split, glue and clamp it, then reinforce with metal mending plates. That sequence is the standard, durable way to repair a cracked or split wooden seat, and skipping any one of the three steps tends to leave a repair that fails again under weight.
- Remove the seat from the chair frame if it’s a separate piece, or clear the surrounding area if it’s integrated.
- Using a doweling jig for accurate alignment, drill holes roughly 1 inch deep along the crack, spacing them about 4 to 6 inches apart.
- Apply wood glue generously into each hole and along the crack itself, then insert dowels and press the pieces together.
- Clamp the repair firmly and let it cure for at least eight hours, checking that the seat surface stays flat rather than cupping under clamp pressure.
- Once cured, position metal mending plates across the break on the underside and screw them into place for added strength.
- Sand any glue squeeze-out flush and test the repair by pressing firmly across the seat before reattaching upholstery.
Watch your clamp pressure on older or brittle timber. Overtightening a clamp on dry, aged wood can crack it further rather than closing the gap you’re trying to fix, so tighten gradually and check for new cracks as you go.
If the grain around the crack has crumbled or the wood is too punky to hold a dowel securely, plain dowel repair won’t hold. In that case, rout out the damaged section and inlay a hardwood strip, or use an epoxy wood filler to rebuild the missing material before you drill and dowel again.
Reupholstering and Replacing Foam to Finish the Job
Once the structure underneath is solid, whether that’s new webbing, replaced springs, or a repaired frame, replace the foam and batting and reupholster to restore comfort and give the seat a finished look. Skipping structural repair and just swapping foam is the single most common shortcut that leads people back to square one within a year.
Foam density matters more than most people realize. Dining chairs, which take direct, concentrated weight without much lateral movement, do well with a medium to firm density foam, typically in the range most upholstery suppliers label as seating foam rather than cushion foam. Occasional chairs and lounge seating can go slightly softer since the load is more distributed. Layer a thin wrap of Dacron batting over the foam before fabric goes on; it softens the foam’s edges and stops fabric from showing foam texture through the surface. For staples, a 22 gauge, 3/8 inch staple handles most fabric weights without tearing through.
- Measure your seat base and cut foam to match, sizing slightly generous rather than tight.
- Attach the foam to the seat base with spray adhesive or by wrapping it down with the base fabric layer.
- Add a layer of Dacron batting over the foam, wrapping it around the edges of the seat base.
- Position your fabric centered over the padded seat, checking pattern alignment if the fabric has a directional print.
- Staple from the center of each side outward, pulling moderate, even tension as you go rather than cranking one corner tight first.
- Fold and finish the corners neatly, trimming excess bulk before the final staples.
- Reinstall the dust cover on the underside to hide the raw staple line and give the seat a clean finish.
Pro Tip: Don’t ask foam to do the job webbing or springs are supposed to do. Thicker or firmer foam feels like a fix for sag, but it’s compensating for a suspension problem rather than solving it. Fix the webbing or springs first, then choose foam for comfort, not as a structural patch.
Reupholstering a basic dining chair seat is genuinely approachable for a beginner; The Spruce notes that replacing a seat cushion often takes an hour or two once the structural work is done, and one yard of fabric typically covers two standard dining chairs. Weloveupholstery’s own step-by-step dining chair guide walks through this exact sequence with more detail on corner folds and fabric handling.
How Much Time and Money Should You Budget?
Set realistic expectations. Quick fixes take under an hour. Webbing replacement or a full reupholstery pass takes several hours spread across a weekend, and for a genuinely low-value chair, the materials and time might cost more than simply replacing it.
One yard of fabric covers roughly two standard dining chairs, which keeps per-chair reupholstery costs reasonable if you’re tackling a full set rather than one piece.
Hidden costs sneak in around tools you don’t already own. A gooseneck webbing stretcher, a doweling jig, or a heavy-duty staple gun each run somewhere between $15 and $60 if you need to buy rather than borrow one, and that can shift the math on a single-chair project.
When several structural problems stack up at once, damaged springs and a warped frame and failed webbing, the labor a professional would charge to sort all of it out can exceed what the chair itself is worth, especially on a low-cost or mass-produced piece. That’s the point where replacement starts looking more sensible than repair.
When to Call a Professional Instead of DIY
Hire a professional when the frame is badly warped, several structural failures are happening at once, the springs are extensively damaged, or the chair is a valuable heirloom you don’t want to risk. DIY repair is genuinely rewarding, but it has real limits, and pushing past them on the wrong piece can cost you more than it saves.
Watch for these red flags:
- Extensive wood rot or soft, crumbling sections that won’t hold screws or dowels no matter how you prep them.
- Insect damage (small holes, sawdust-like frass, or a hollow sound when you tap the wood).
- Rails that are visibly warped or twisted rather than just loose at the joint.
- Brittle vintage softwood that splits when you try to drill or screw into it.
- Multiple failure points at once, frame, webbing, and springs all compromised on the same chair.
When you’re getting quotes, ask a prospective upholsterer to spell out the scope of work in writing: which components they’re replacing versus repairing, what materials they’ll use (fabric weight, foam density, webbing type), an estimated timeline, and whether the work carries any warranty. A vague verbal quote with no breakdown is a sign to keep shopping.
Even if you end up hiring out the work, understanding the repair steps in this guide helps you evaluate whether a quote makes sense. If an upholsterer’s proposed approach sounds thinner than what you’d expect after reading through webbing replacement or spring repair, that’s worth asking about directly.
Practitioner Pointers From Hands-On Chair Repairs
The single biggest mistake I see in DIY chair repair threads is people jumping straight to fabric and foam before they’ve checked the frame. It doesn’t matter how nice your new upholstery looks if the joint underneath is still loose; you’ll be redoing the whole thing in six months.
Three things I’d tell anyone starting this kind of project. First, always check the frame before you touch fabric or webbing, because a wobbly joint under new upholstery just means you’re covering up a problem instead of solving it. Second, use an actual gooseneck stretcher for webbing rather than pulling by hand; the difference in how long the repair lasts is noticeable, and hand tension almost always falls short of the range that keeps webbing from sagging again within a year or two. Third, when a glued joint is in question, clamp it and walk away overnight rather than testing it in twenty minutes because you’re impatient to finish. Wood glue needs real cure time to reach its full strength, and rushing that step is how joints come loose again a few weeks later.
One more thing worth saying plainly: measure twice, cut once applies to plywood support boards and dowel holes just as much as it applies to framing a house. A seat board cut a quarter inch too small rattles around inside the frame instead of resting flush on the rails, and a misaligned dowel hole can split a seat that was otherwise perfectly salvageable. Patience at the measuring stage saves you material and saves you from redoing work you thought was finished.
Get the Full Walkthrough and Supplies From Weloveupholstery
Weloveupholstery is where this repair sequence gets the detail a short guide can’t cover. Every method above, webbing, frame joints, foam, has its own step-by-step tutorial with photos showing exactly where staples go and how a corner fold should look before you commit fabric to it.

If you’re heading straight into a reupholstery pass, the dining chair step-by-step guide shows the full corner and fabric technique in more detail than fits here. Working on a frame joint or an armrest at the same time? The sofa armrest repair techniques guide covers similar joint reinforcement principles on a different furniture type. And before you buy anything, the fabric guide breaks down which weights and weaves actually hold up on a dining chair versus an occasional piece.
If you’d rather browse the full library first, the DIY guides archive is the central hub for every tutorial Weloveupholstery has published, organized by repair type. Once your chair is repaired and back in daily use, a resource like iCleanse’s upholstery cleaning tips is worth bookmarking too, since keeping fabric clean extends the life of the reinforcement work you just did. Start with the fabric guide, pick your materials, and follow the matching tutorial through to the last staple.
Frequently Asked Questions
What’s the fastest way to reinforce a chair seat that’s sagging right now?
A plywood support board cut to fit inside the seat frame, resting on the rails, gives you a stable surface in under 30 minutes. It’s a stopgap, not a permanent fix, so plan to address the webbing or springs underneath once you have time.
Can I just add more foam instead of fixing the webbing or springs?
Not for long. Extra foam masks a suspension problem instead of solving it. If the webbing has sagged or the springs are flattened, foam alone will feel firm for a few weeks and then sag right back down with your body weight.
What’s the best material to reinforce chair seat webbing with?
High-tensile nylon or polyester webbing holds tension longer than jute or cotton and resists moisture, which is why most professional upholsterers use it for long-term seat support.
How do I know if my chair needs frame repair or just new upholstery?
Press down at the center of the seat while watching the rails. If the rails flex or the joints move, that’s a frame problem that needs glue and reinforcement before any upholstery work. If the rails stay solid and only the seat surface gives, the issue is likely webbing, springs, or foam.
When should I stop trying to DIY a chair repair and call a professional?
Call a professional when you find extensive wood rot, insect damage, a badly warped frame, or several structural failures happening at once. For a valuable or sentimental piece, a professional estimate is worth getting before you start cutting or drilling anything.
Sources
These sources back the specific measurements, materials, and methods used throughout this guide, and each one adds detail worth a closer look if you want more step photos or tool recommendations for a particular repair.
- How to Reupholster a Chair Seat With Webbing (szoneierwebbing)
- How to repair wooden furniture (HowStuffWorks)
- Rapidrepair
- How to reupholster a chair seat (The Spruce)