Heads up: this post contains affiliate links. If you buy through them, We Love Upholstery may earn a small commission at no extra cost to you.
Three fixes solve almost every sofa back cushion problem. If the cushion is sewn onto the sofa and just looks flat, a bottom-load foam insertion wrapped in Dacron batting restores the shape in under an hour. If the cushion is a separate piece that keeps sliding or falling off the backrest, sew-on hook-and-loop strips or non-slip grippers solve it in about 20 minutes. If the sofa sags in a way that foam can’t fix, the problem is the frame, webbing, or springs underneath, and that’s a half-day repair, not a quick patch.
Matching symptom to method saves you from wasting an afternoon on the wrong fix:
- Cushion looks flat or sunken but sofa feels solid underneath: bottom-load foam + Dacron (beginner-friendly, 45 to 90 minutes)
- Cushion shifts, slides, or falls off the back: hook-and-loop or non-slip pads (beginner-friendly, 15 to 30 minutes)
- Fabric is torn at a seam: ladder stitch closure with a curved needle (moderate skill, 20 to 40 minutes)
- Sofa dips, creaks, or leans even with new cushions: webbing, spring, or frame repair (advanced, 2 to 4 hours)
Key Takeaways
Most sagging or shifting sofa back cushions can be fixed at home with foam, batting, or fasteners, and only true frame failure requires professional repair.
| Point | Details |
|---|---|
| Match method to symptom | Bottom-load foam fixes sag; hook-and-loop fixes slipping; frame repair fixes structural lean or creaking. |
| Wrap foam in Dacron | Batting hides sharp foam edges and restores the cushion’s rounded crown before you close the seam. |
| Choose density, not just firmness | High-resiliency foam holds its shape longer than standard craft foam of the same thickness. |
| Check underneath before buying foam | A missing support board often causes the same sagging look that gets blamed on worn-out foam. |
| Start with Weloveupholstery’s tools checklist | It lists the curved needle, thread, and cutting tools needed for the bottom-load method covered here. |
Where to Learn More Before You Start
The hook-and-loop guide explains adhesive versus sew-on fastener choices in more detail. The sagging cushion tutorial shows the Dacron wrapping technique with step photos. For seam access and re-stitching on a specific sofa model, the Karlstad arm repair walkthrough is a useful visual reference. For deeper reading on this site, see how to fix a sagging couch cushion and the foam density guide.
Table of Contents
- How to Reattach a Sofa Back Cushion That’s Sewn In
- How Do You Fix a Loose Removable Back Cushion?
- Is the Problem Foam, or Is It the Frame Underneath?
- What Foam Density and Batting Should You Buy?
- The Full Bottom-Load Repair, Step by Step
- How to Keep Your Repair From Sagging Again
- Frequently Asked Questions
- Sources
How to Reattach a Sofa Back Cushion That’s Sewn In
Sewn-in back cushions are the trickiest to work on precisely because you can’t just pull them off and start over. The upside is that you rarely need to. Most sagging in an attached cushion is a foam problem, not a fabric or frame problem, and you can fix it from a small opening without touching the rest of the upholstery.
1. Find your access point before you cut anything. Check the bottom seam first. Many manufacturers leave a zipper or a looser stitch line along the bottom of the cushion specifically so foam can be serviced later. Run your fingers along every seam. If there’s no zipper, look for the blind seam, usually the bottom back edge, where the fabric was hand-finished rather than machine-stitched through a welt cord. That’s your easiest reentry point because it’s already meant to be opened and closed by hand.
2. Assess what’s actually failed. Press the cushion firmly in the center and at the corners. If it compresses fully and slowly springs back but the front profile still sags, the foam has broken down and lost resilience. If you feel lumps or hear crackling, the foam has crumbled and needs replacing outright, not just supplementing. If the cushion feels fine but the whole panel leans or wobbles, stop here. That’s a frame issue, and no amount of foam will fix it.
3. Cut your replacement foam. For most flattened back cushions, a 1-inch high-density foam sheet is enough to restore lift without over-stuffing the cover. Cut it about a half inch narrower on each side than the cushion cavity so it slides in without bunching against the seams.
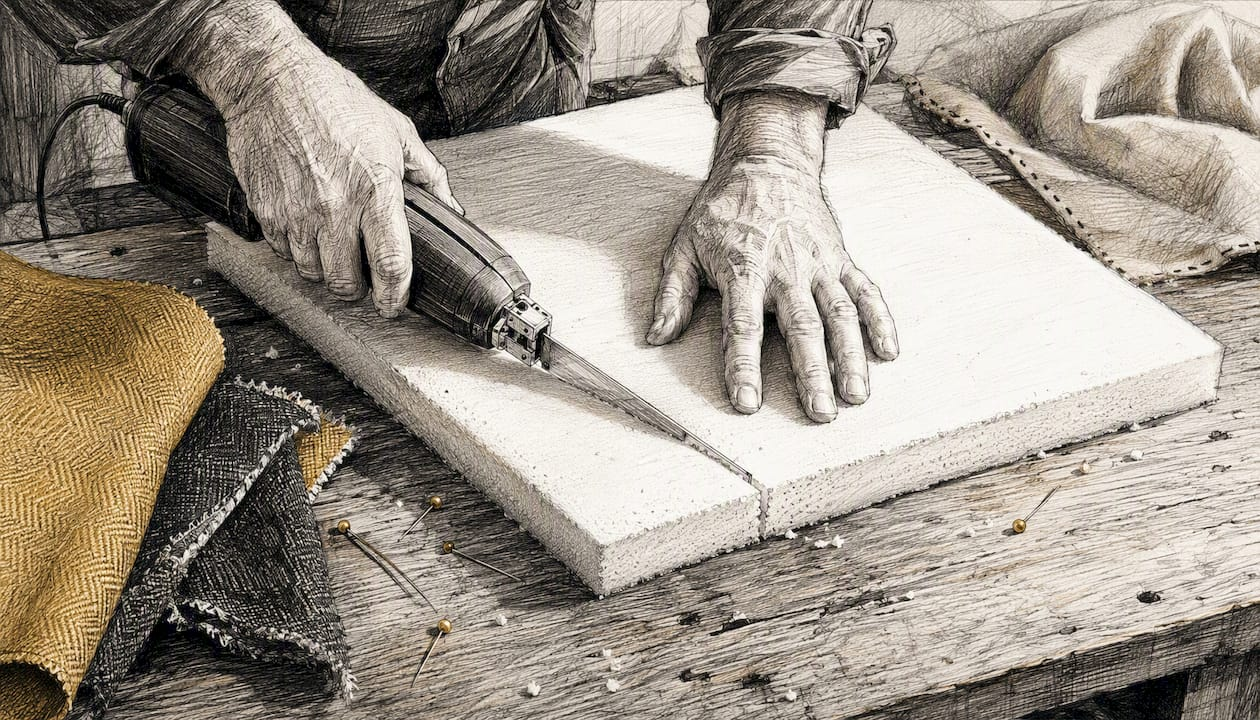
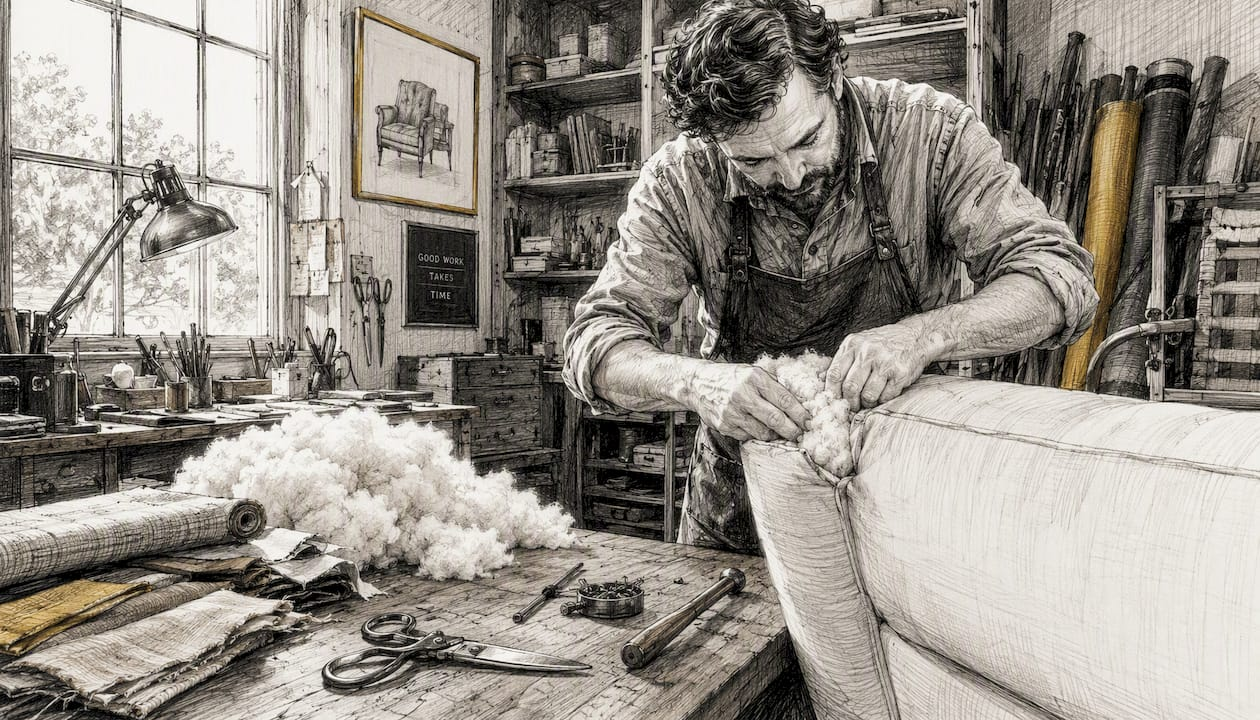
4. Wrap it in Dacron before it goes in. This step gets skipped constantly, and it’s the difference between a repair that looks professional and one that looks like you shoved a foam block into a pillowcase. Wrapping the foam in Dacron batting softens the hard edges of the foam and rebuilds the rounded “crown” that a cushion has when it’s new. Wrap it like a burrito, tucking the ends under, and secure loosely with a few pins so it doesn’t shift while you’re inserting it.
5. Insert through your access point. Slide the wrapped foam in at an angle, corner first, then work it flat. If the opening is tight, don’t force it. Trim a little off the foam’s edges rather than tearing the fabric seam wider than you intended.
6. Pack the corners separately. Front and top corners flatten faster than the center of a cushion because they take the most contact. Hand-pack loose poly-fill or Dacron scraps into these corners after the main foam insert is in place. This single step fixes the “deflated” look that a flat foam swap alone won’t solve.
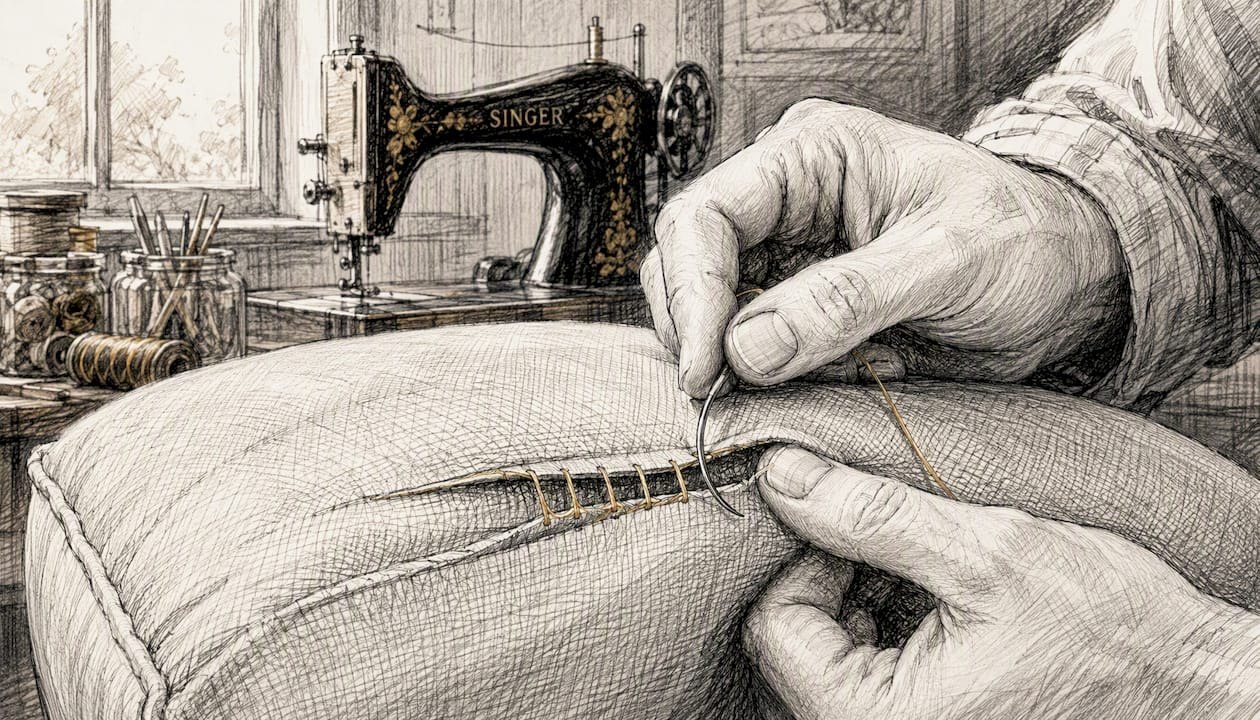
7. Close the seam with a ladder stitch. Thread a curved upholstery needle with bonded nylon thread. Starting at one end of the opening, take a small stitch through the fold of fabric on one side, then a matching stitch directly across on the other side, alternating back and forth without pulling tight yet. Once you’ve stitched the full length of the opening, pull the thread taut in one smooth motion. The seam closes and the thread disappears into the fold. This is the ladder or slip stitch technique upholsterers rely on because it leaves no visible thread line on a finished seam.
8. Test before you call it done. Press the repaired area the same way you did during assessment. It should feel firm and spring back within a second or two. If it still feels soft, you likely need a second foam layer rather than more batting.
If the fabric itself is fragile, brittle, or already fraying near the seam, don’t force a needle through it repeatedly. A few passes with fabric adhesive or a discreet strip of sew-on hook-and-loop just inside the opening can hold things together without adding stress to weak material. And if you find the fabric tearing further with each attempt, or the cushion cover is disintegrating rather than just worn, that’s the point to stop and call an upholsterer instead of pushing through. Trying to force a repair on fabric that’s past its structural limit usually costs more to fix afterward than calling in help early.
Pro Tip: Keep a spare scrap of your sofa’s fabric, even a few square inches from an armrest tag or hidden panel, taped inside a kitchen drawer. If your ladder stitch ever needs a patch instead of just a close, you’ll have a color-matched piece ready instead of guessing at a fabric store six months later.
How Do You Fix a Loose Removable Back Cushion?
Unattached back cushions are the easier repair, and the fix usually has nothing to do with foam at all. If a cushion slides off the backrest or won’t stay seated against the frame, you’re dealing with a fastening problem, and there are four practical ways to solve it.
Hook-and-loop, but pick the right kind. Adhesive-backed hook-and-loop works fine on smooth, compatible surfaces, but sew-on hook-and-loop generally holds up better when it needs to grip fabric directly, since adhesive backing needs a clean, non-porous surface to bond well and most cushion backs are woven fabric, not smooth vinyl. If you’re attaching to fabric on both sides, sew it on. If one side is a smooth wood or plastic frame rail, adhesive-backed strips can work there.
- Sew two strips of hook-and-loop per cushion, positioned to provide stable fastening without letting the cushion pivot.
- Test any adhesive strip on a hidden patch of fabric first. Some upholstery fabrics react poorly to adhesive residue.
- Sew-on placements tucked inside the seam allowance stay invisible from the front and are easy to redo later if the cushion needs to come off for cleaning.
- Non-slip rug pad material, cut into small squares and placed between cushion and frame, stops sliding on smooth wood or leather without any stitching or adhesive at all.
- Ties or ribbon loops sewn to the cushion’s bottom corners and knotted around the frame’s back rail work well on sofas with exposed wood, though they’re visible if the frame isn’t hidden by a skirt.
- Snap tape, one half sewn to the cushion and the other to the frame cover, gives a fastening that’s fast to remove for washing and reasonably durable for daily use.
Non-slip pads are a fast fix that involve no sewing, but they wear out faster than fabric strips and require periodic replacement depending on use. Hook-and-loop lasts longer, often several years, since the fabric backing doesn’t compress the way foam pads do.
If you’ve got company arriving in an hour and a permanent fix isn’t happening today, a strip of double-sided carpet tape between cushion and frame will hold through an evening. It’s not a long-term answer, but it beats cushions sliding off mid-conversation.
Pro Tip: If your cushions constantly shift toward one side of the sofa, check whether the frame itself is level first. A slightly uneven leg can make even well-secured cushions creep downhill over weeks, and no amount of hook-and-loop fixes a tilted frame.
Is the Problem Foam, or Is It the Frame Underneath?
Not every sagging back cushion is a foam problem, and fixing foam on top of a broken frame just buys you a few weeks before it sags again. Here’s how to tell which one you’re actually dealing with.
Press down firmly in the center of the cushion and hold it for three seconds. If it compresses evenly and rebounds within a couple of seconds, the foam is probably fine or just needs a supplement. If you hear a wooden crack, a metallic ping, or feel the whole panel shift downward rather than compress, something structural has given way.
Sit in the seat next to the cushion and rock your weight side to side. A healthy frame stays quiet and level. A frame with broken or stretched webbing will visibly dip in the middle, and one with cracked rails will flex or creak where it shouldn’t.
Check for visible sag between the arm and the cushion. If there’s a gap that wasn’t there when the sofa was new, or if the back panel leans rather than standing upright, that’s webbing or spring failure, not foam fatigue.
1. Expose the frame. Flip the sofa or tilt it against a wall, and remove the dust cover on the underside or back panel using a seam ripper or staple remover. Keep the cover intact if you can. You’ll likely staple it back on when you’re done.
2. Diagnose the specific failure. Stretched or torn webbing looks visibly loose or has separated from its staples. Broken springs feel like a dead spot with no resistance at all. Cracked rails show as visible splits in the wood frame itself.
3. Re-tension or replace webbing. Pull new elastic or jute webbing taut across the frame using a webbing stretcher, and staple it down in a crisscross pattern matching the original layout.
4. Add a plywood support board if springs are compromised but intact. A rigid support board placed under the cushion area prevents the cushion from sinking into gaps between weakened springs, which meaningfully extends the life of any foam repair you do on top of it.
5. Sister a cracked rail with a mending plate or a matched wood strip screwed alongside the damaged section rather than trying to replace the entire rail.
6. Reattach the dust cover and flip the sofa back once everything underneath is solid.
Work with the sofa lifted or tilted, not balanced on its side unsupported, and wear gloves when handling old staples. If you’re staring at multiple broken springs, a rail that’s split in more than one place, or a frame that’s structurally compromised across several points rather than one, that’s beyond a weekend DIY fix. At that point an upholsterer with frame repair experience will save you time and probably money, since rebuilding a frame from scratch on your first attempt tends to take far longer than a professional job. Our guide on sofa back support repair types breaks down webbing, spring, and support board options in more depth if you want to compare approaches before you start.
What Foam Density and Batting Should You Buy?
Density and firmness are not the same measurement, and mixing them up is the single most common reason a DIY foam repair sags again within months. Density refers to how much the foam weighs per cubic foot, essentially how much material is packed into the foam. Firmness, measured as ILD (Indentation Load Deflection), refers to how much resistance you feel when you press on it. A foam can be dense and soft, or light and firm. For a repair that lasts, you want density, since that’s what determines how long the foam holds its shape before it breaks down.
High-resiliency foam holds its shape over time better than standard low-density craft foam, which is why it shows up repeatedly in practitioner recommendations for back cushion repairs. When you’re shopping, look for foam explicitly labeled “HR” or “high-resiliency,” and check the density number if it’s listed on the packaging.
- For many flattened back cushions, a single high-resiliency foam sheet placed under the core helps restore lift.
- For badly sagged cushions, layering foam sheets can work better than one thick piece, as it conforms more easily around corners and seams.
- Wrap every foam insert in Dacron batting before inserting it. This isn’t optional if you want a finished look, since Dacron smooths the foam’s sharp edges and rebuilds the rounded crown that a flat foam block alone won’t produce.
- Buy foam by the sheet from a fabric or craft store, a home center, or a dedicated upholstery supplier. Upholstery suppliers typically carry a wider range of densities and will cut custom sizes, which matters if your cushion cavity is an unusual shape.
Check density and ILD ratings when they’re listed, since a foam sold cheap with no density spec is often the same low-grade material that sagged in the first place. Our foam density guide walks through specific density numbers by cushion type if you want exact specs before you order.
The Full Bottom-Load Repair, Step by Step
This is the sequence Weloveupholstery recommends for most attached back cushions, start to finish, with the tools and timing laid out so you know what you’re getting into before you start cutting fabric.
Tools and materials checklist:
- Curved upholstery needle
- Bonded nylon or heavy-duty polyester thread
- Seam ripper
- Sharp scissors or an electric knife for cutting foam
- 1-inch high-density (HR) foam sheet, cut to size
- Dacron batting, enough to wrap the foam insert
- Poly-fill for corner packing
- Straight pins
- A clean, well-lit workspace, ideally a table rather than the floor
Clear enough space to lay the sofa on its back or side if needed, and work somewhere with good light. Missing a loose thread or a weak seam because you’re working in dim light is how small repairs turn into bigger ones.
1. Locate your access point along the bottom seam or blind junction, as covered earlier, and test it gently to confirm it opens without tearing.
2. Open the seam with a seam ripper, working slowly and only as far as you need. A 6 to 8 inch opening is usually enough to work foam through.
3. Remove and inspect the old foam. If it’s crumbling, pull out as much loose material as you can before inserting anything new.
4. Cut your new HR foam sheet to match the cavity, trimmed slightly narrower than the opening.
5. Wrap the foam in Dacron, securing loosely with pins so it holds its shape during insertion.
6. Insert the wrapped foam at an angle, corner first, easing it into place without forcing the seam wider.
7. Hand-pack poly-fill into the front and top corners after the main insert is seated, restoring the rounded profile at the points that flatten fastest.
8. Thread your curved needle with bonded nylon thread and begin the ladder stitch at one end of the opening.
9. Alternate small stitches through the folded fabric edge on each side, working the full length of the opening before pulling anything tight.
10. Pull the thread taut in one continuous motion to close the seam invisibly, then knot and trim.
11. Press-test the repair, checking that it compresses evenly and rebounds within a couple of seconds.
The most common mistake at the stitching stage is pulling each individual stitch tight as you go instead of waiting until the whole seam is stitched. That bunches the fabric and leaves a puckered line instead of a smooth closure. Wait until every stitch is placed, then pull once.
Budget 45 to 90 minutes for a single cushion if this is your first attempt, closer to 30 minutes once you’ve done a few. Difficulty is moderate. It’s forgiving of small mistakes but rewards patience at the stitching step.
Pro Tip: Do a “72-hour check” after finishing. Sit on the repaired cushion normally for a few days, then press it again. If it’s held its shape, you’re done. If it’s already sinking, you likely need a second foam layer rather than a redo of the stitching.
How to Keep Your Repair From Sagging Again
A repair that looks perfect on day one can start slipping by week three if you skip basic maintenance. A few small habits make the difference between a fix that lasts years and one you’re redoing every spring.
- Fluff and massage back cushions weekly, working the filling back toward the center and corners before it has a chance to settle unevenly.
- Rotate cushions if your sofa design allows it, so the same spot isn’t taking all the wear.
- Check the repair again at the 3-day mark and again around the 3-month mark, pressing the same way you did during your original assessment.
- Keep a plywood support board under high-use cushion areas if your sofa has open gaps between springs, since it stops new foam from sinking the same way the old foam did.
- Avoid piling heavy items, blankets, or leaning body weight against the top rail of the sofa back, since that stress transfers directly to your repaired seam.
- If a cushion starts feeling soft again within a few months, a quick fix is often just adding a second thin foam layer or re-tightening a hook-and-loop strip, not redoing the whole repair.
A Note From Dustin on the Repairs Homeowners Get Wrong
The mistake I see most often isn’t a bad stitch. It’s skipping the Dacron wrap because it feels like an unnecessary step when you’re already tired of digging through a couch cushion. Skip it, and the repair looks lumpy no matter how good your foam choice was. Wrap it, and even a first-timer’s cushion looks like it came from a shop.
The quick win almost nobody expects: half of the “sagging cushion” repairs I get asked about aren’t foam problems at all. They’re a loose or missing support board letting the cushion sink between springs. Foam gets blamed because it’s the visible symptom, but check underneath before you buy a single sheet of foam.
Get the Supplies and Guides to Finish This Repair Right
Doing this repair once with the right materials on hand beats doing it twice with whatever was in the garage. Weloveupholstery’s upholstery tools checklist lists exactly what you need for the bottom-load method covered above: curved needle, bonded thread, seam ripper, and the foam-cutting tools that make clean edges instead of ragged ones.

If you’re still deciding between foam types, density specs, or which batting to buy, the materials and supplies section breaks down what to look for before you order, so you’re not guessing at a store shelf. And if this cushion is one part of a bigger project, maybe the armrests are worn too, or the frame needs more than a support board, browse the full DIY guides library for the next step. Start with the tools checklist, confirm you have what the bottom-load method requires, then tackle the repair with everything already on the table instead of half your supplies still on order.
Frequently Asked Questions
Can I reattach a sofa back cushion without sewing?
Yes, if the cushion is a removable, unattached piece. Adhesive-backed hook-and-loop, non-slip pads, or ties can secure it without a needle. Attached cushions that are sewn into the sofa generally do need a stitch to close the access opening after a foam repair.
How long does a bottom-load foam repair last?
A properly done repair with HR foam and Dacron batting typically holds its shape for several years under normal use, especially when paired with a support board underneath. Repairs using low-density foam or skipping the batting wrap tend to flatten again within months.
What if my sofa doesn’t have a zipper on the cushion?
Look for the blind seam, usually along the bottom back edge, which is hand-finished rather than machine-stitched and designed to be opened for exactly this kind of repair. A seam ripper opens it cleanly, and a ladder stitch closes it invisibly afterward.
Is a sagging cushion always a foam problem?
No. If the cushion compresses unevenly, if you hear cracking or feel a dead spot with no resistance, or if the whole panel leans rather than staying upright, the issue is likely webbing, springs, or the frame itself rather than the foam.
Where can I buy the right foam for this repair?
Fabric and craft stores, home centers, and dedicated upholstery suppliers all carry HR foam sheets. Upholstery suppliers usually offer a wider density range and custom cutting, which helps if your cushion cavity is an unusual size.
Sources
- Securing Couch Cushions with Hook and Loop
- How to Fix Sagging Couch Cushions
- IKEA Karlstad Sofa Arm Repair : 6 Steps (with Pictures) – Instructables