Heads up: this post contains affiliate links. If you buy through them, We Love Upholstery may earn a small commission at no extra cost to you.
Yes, most channel back chairs can be reupholstered by a competent DIYer, provided you have patience, a sewing machine that can handle multiple fabric layers, and a willingness to mark things twice before you cut once. This is not a weekend project you knock out during a rainy Saturday. Plan on several days of hands-on work spread out over multiple sessions, with a moderate to advanced difficulty rating that hinges almost entirely on how carefully you plan your channels before touching fabric. The single habit that separates a clean result from a lumpy one: marking channel lines on the foam first and transferring those marks to the fabric, working from the center channel outward, according to StitchDesk’s channel tufting guide. Skip that step and you’ll spend twice as long fixing drift later.
Before you commit a chair to your workbench, run through this checklist:
- Skill level: You should already be comfortable sewing long, straight seams on a machine and using a staple gun without hesitation.
- Tools on hand: A heavy-duty or industrial sewing machine, an electric or pneumatic staple gun, a regulator needle, and a long straightedge.
- Workspace: A well-lit area with a stable table, at least 6 feet of clearance around the chair, and floor protection for foam scraps and staples.
- Pattern access: Either the original fabric panels (kept intact) or a downloadable channel template you can scale to your chair.
- Fabric math done: You’ve calculated yardage including the extra pulled into each groove, not just the flat back dimensions.
If you’re missing two or more of these, start with a smaller practice piece before you touch the real chair.
Key Takeaways
Channel back chair reupholstery succeeds when you mark channels on foam first, work from the center outward, and match fabric buffer to your actual channel count.
| Point | Details |
|---|---|
| Mark foam before fabric | Cut and mark channel lines on foam first, then transfer to fabric to prevent drift. |
| Budget extra yardage | Add a 15% fabric buffer beyond flat dimensions to cover fabric pulled into each groove. |
| Staple at groove bases | Placing staples at the bottom of each groove, not the walls, prevents channels from splaying outward. |
| Practice before the real chair | Build marking and stapling habits on a small bench cushion or headboard strip first. |
| Follow a tested sequence | Weloveupholstery’s step-by-step guides help you avoid the drift, puckering, and tension errors that ruin first attempts. |
Table of Contents
- What Materials and Tools Do You Need for Channel Tufting?
- How Do You Assess a Chair Before Starting Reupholstery?
- How Wide Should Channels Be and How Do You Make a Pattern?
- How Do You Sew and Assemble Channel Panels?
- How Do You Attach the Channel Panel to the Frame?
- How Do You Finish the Seat to Match the Channel Back?
- Why Do Channels Pucker or Widen Unevenly?
- What Does a Channel Back Chair Reupholstery Project Cost?
- Where Can You Find Patterns and Video Tutorials?
- What Skills Should You Practice Before Tackling a Full Chair?
- How Do You Remove and Save Old Padding Without Wasting It?
- What Fabric Works Best for a Channel Back Chair?
- Do You Need to Disassemble the Chair Frame First?
- What Safety Precautions Should You Take?
- What I’ve Learned From Years of Fixing Other People’s Channel Backs
- Let Weloveupholstery Guides Take the Guesswork Out of Your Next Project
- Frequently Asked Questions
- Sources
What Materials and Tools Do You Need for Channel Tufting?
Channel back chair reupholstery eats through more fabric and batting than a flat-panel job, so buying the right quantity up front saves you a second trip to the fabric store mid-project. Here’s the full list.
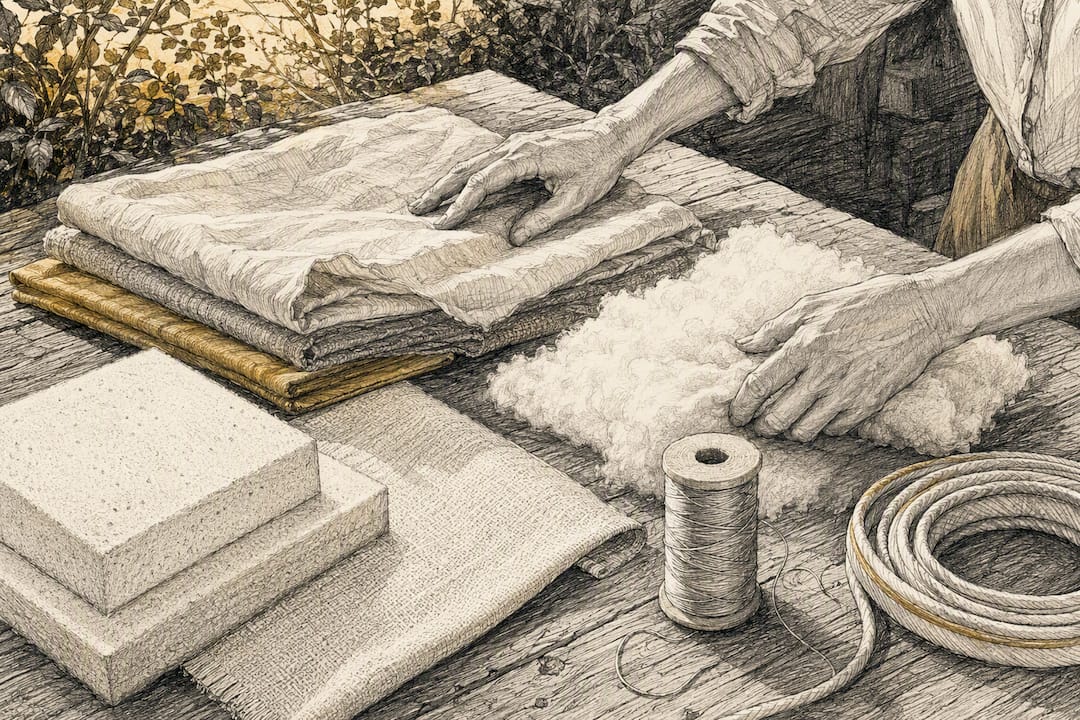
Fabric: Budget for your channel count plus a fabric buffer, since fabric pulled into each groove has to come from somewhere in the panel, a point confirmed by ToolsWeek’s tufting breakdown. For a standard wing or club chair back with several channels, fabric needs can vary, typically requiring additional yardage depending on width. Check the Weloveupholstery fabric guide before ordering, since nap direction and repeat size change your math.
Foam: High-density foam with a thickness suitable for channel backs is commonly used. You’ll cut grooves into it rather than gluing separate strips, in most modern builds.
Batting: Polyester batting wraps the foam to soften hard edges and prevent the fabric from showing foam texture through the weave. Plan on one layer per channel, sometimes two on outer channels where padding tends to compress faster.
Thread, welt cord, and adhesives: Heavy-duty upholstery thread (V-69 or similar), cotton welt cord for edge finishing, and spray adhesive for tacking batting to foam before final assembly.
Fasteners: 3/8 inch fine-wire staples are the standard choice for most channel back frames; check your frame’s wood density before sizing up.
For tools, here’s where most first-timers underspend and pay for it later:
- Staple gun: An electric model like the Arrow T50ACN is the standard recommendation for vertical channel tufting, because the sheer staple volume in a multi-channel back causes real hand fatigue with a manual gun, according to Bright Green Door’s DIY channel tufting project. If you’re only doing one chair, renting or borrowing an electric gun is worth it. If you plan to do more than one project a year, buy one. The Weloveupholstery staple gun guide breaks down which models actually hold up.
- Sewing machine: You need a machine rated for heavy fabric and multiple layers, ideally with a walking foot. A basic home machine will jam on thick upholstery velvet.
- Regulator needle: Used to push and distribute stuffing evenly inside each channel after sewing, and to smooth lumps without opening a seam.
- Long straightedge and chalk wheel: For marking channel lines on both foam and fabric with consistent spacing.
Resources like Sailrite offer both the heavy-duty machines and instructional content that many DIYers lean on for channel work, and Rowley publishes pattern diagrams specifically built around this project type. Between the two, you can source almost everything you need without guessing at specs.
Pro Tip: Don’t buy a manual staple gun to “save money” on a channel back project. The difference in hand fatigue between stapling 40 staples and 400 is not linear, it’s exponential, and a sore hand on channel three of eight is how sloppy stapling starts.
How Do You Assess a Chair Before Starting Reupholstery?
Not every chair is worth the labor. Before you strip a single staple, check the frame for cracked joints, soft or crumbling wood, and broken springs. If the frame flexes when you push firmly on the arms, or if webbing sags more than an inch under hand pressure, you’re looking at a structural repair project first and a reupholstery project second.
Once you’ve confirmed the frame is sound, here’s the removal sequence:
- Photograph the chair from every angle before removing anything, including close-ups of the stapling pattern and the underside of the frame.
- Label each channel as you remove it, top, bottom, and position, using masking tape and a marker directly on the fabric or backing.
- Remove staples slowly with a staple lifter, keeping each channel panel intact as a single unbroken unit wherever possible.
- Set removed channels aside in their labeled order, don’t toss them until the new panel is built and test-fitted.
Many original channel-back builds use a muslin or burlap base you can salvage as an exact pattern, so labeling top, bottom, and location before removal lets you recreate the original fit almost precisely, which matters most on curved backs, per the South Dakota State University Extension guide.
While you’re in there, record these measurements:
- Width and height of each individual channel
- Overall back width, height, and curve depth if the chair has a shaped back
- Foam thickness at the thickest and thinnest points
- Existing groove depth if the old foam is being reused
Photograph the edges where fabric wraps around the frame and the exact stapling pattern along the bottom rail. Those two details are the ones DIYers forget to record and then have to guess at during reassembly.
How Wide Should Channels Be and How Do You Make a Pattern?
Channel width is a design decision, not just a technical one. Narrower channels make chair backs appear taller and slimmer, while wider channels create a broader, lower silhouette, a visual effect confirmed by the SDSU Extension’s upholstering guide. Standard club and wing chairs typically have multiple channels spaced proportionally across the back, with numbers varying by chair size and desired aesthetics, but measure your specific frame before committing to a count.
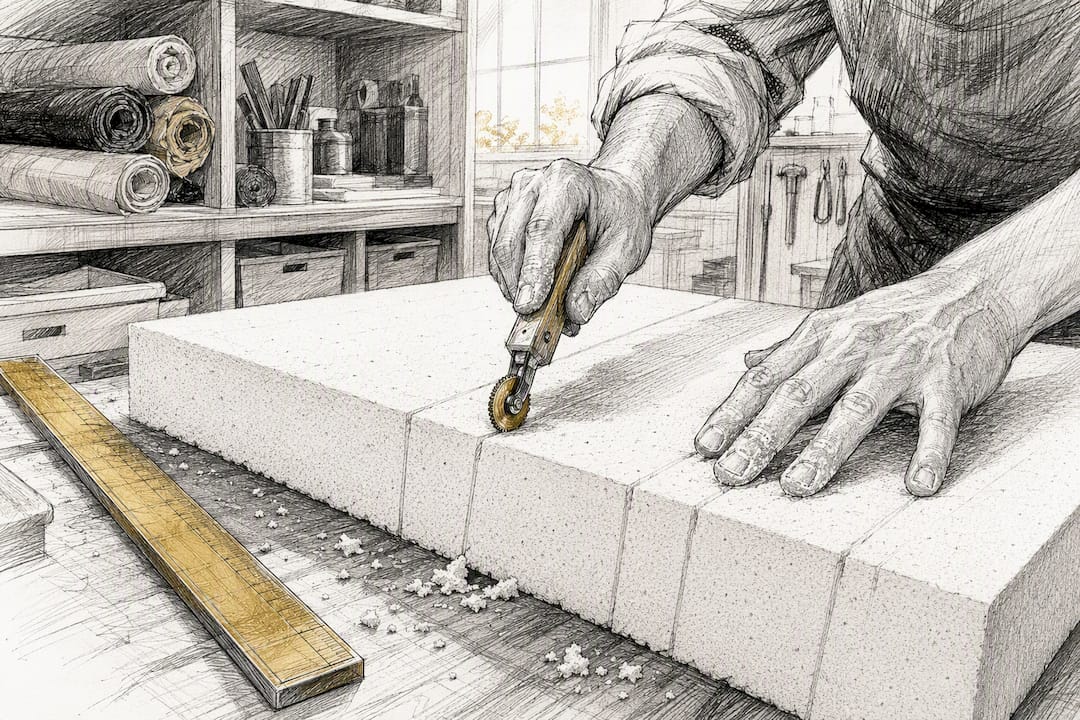
Start by laying out channel lines on paper at full scale, matching your recorded back dimensions. Transfer that layout to the foam using a chalk wheel and straightedge, then cut grooves to about half to two-thirds of the foam’s depth. A 4 inch foam slab needs a groove roughly 2 to 2.5 inches deep to hold a clean channel shape without collapsing, according to StitchDesk. Only after the foam is marked and cut do you transfer those same lines to your fabric.
Here’s a sample yardage calculation for a mid-size club chair back:
Pro Tip: Mark your center channel first, on both foam and fabric, and work outward symmetrically from there. If you start from one edge and work across, small measurement errors compound and your last channel on the far side ends up visibly narrower than the first.
How Do You Sew and Assemble Channel Panels?
You have two paths here: the sewn-channel method, where you sew individual fabric tubes and stuff them with batting or loose fill, or the foam-channel method, where you cut grooves directly into a solid foam slab and wrap fabric over the ridges. Sewn channels give you more control over fill density and are the traditional approach for vintage restorations. Foam channels are faster and more forgiving for a first project, since the shape is already built into the foam before fabric touches it.
If you’re going the sewn route, here’s the sequence:
- Cut fabric strips with a 1/2 inch seam allowance on each long edge, adding extra length for the pull that channel tufting requires.
- If you’re working with velvet or another pile fabric, cut every strip with the nap running the same direction. Mismatched nap shows up as color shifts under different light angles once the chair is finished.
- Sew each channel as a long tube, right sides together, leaving both ends open for stuffing.
- Turn each tube right side out and stuff with batting or loose polyester fill, packing evenly along the full length so no channel bulges more than its neighbors.
- Hand-stitch or machine-baste the open ends closed once fill is even.
- Lay the finished tubes side by side in your marked order and join them along their seam allowances, checking width consistency every two or three channels.
For the foam-channel method, wrap batting over your pre-cut foam grooves, tack it lightly with spray adhesive at the groove bottoms, then lay your marked fabric panel over the top and press it down into each groove by hand before stapling.
Whichever method you choose, stop and check your work at three points: after sewing the first two channels (to catch a seam allowance error before it repeats eight times), after stuffing (to check for uneven fill), and after joining all channels into one panel (to confirm the total width matches your frame measurement). Use a slightly shorter stitch length than you’d use on a garment, around 8 to 10 stitches per inch, since upholstery fabric under tension needs the reinforcement a longer stitch doesn’t provide.
Pro Tip: If channel four looks noticeably wider than channels three and five, don’t wait until the panel is finished to fix it. Rip that seam now. A width inconsistency that’s easy to correct mid-assembly becomes a full panel rebuild once everything is joined and stapled.
How Do You Attach the Channel Panel to the Frame?
Fitting the assembled panel to the frame is where tension control makes or breaks the finish. Start at the center channel, staple it in place at the top and bottom rails, then work outward toward each edge in matching pairs, left and right, to keep tension even across the width. Clamping the panel temporarily at the top corners before you staple gives you a chance to check alignment without committing.
A detail that trips up almost every first-timer: staple at the bottom of each groove, not on the groove walls. Stapling into the walls causes the channel to splay outward instead of holding its rounded shape, and that splay is nearly impossible to hide once the chair is finished.
Finishing checklist for the edges:
- Cap the top and bottom of each channel by folding fabric neatly under before the final staple row.
- Add welt cord or piping along visible seams where the back panel meets the frame’s wood trim, for a clean transition line.
- Trim excess fabric close to the staple line on the underside of the frame, where it won’t be visible but also won’t bunch up.
- Check the front-facing view from a few feet back before calling it done. Small puckers are more visible from a normal viewing distance than they are up close.
Pro Tip: A slightly uneven channel width near the bottom rail, where it’s mostly hidden by the seat cushion, is worth living with. A visible pucker at eye level on the top third of the back is not. Know which flaws are worth re-sewing for and which aren’t.
How Do You Finish the Seat to Match the Channel Back?
The seat rarely gets the attention it deserves in channel back projects, but a mismatched seat finish undercuts an otherwise clean back panel. You have three options: reuse the original cushion cover if it’s in good shape, replace just the foam and rebuild with new fabric, or build an entirely new boxed seat with matching fabric and welt trim.
For most mid-range chairs, replacing the foam while keeping the original cushion shape is the practical middle ground. It costs less than a full rebuild and gives you fresh support without re-engineering the seat’s structure.
- Remove the seat cushion or seat deck fabric, checking webbing and springs for sag while you’re in there.
- Cut new foam to match the original thickness, using denser foam than the back cushioning since seats bear more direct weight.
- Cover with fabric that matches your back panel’s pattern repeat, aligning any directional print or nap so the two pieces read as one cohesive design.
- Reattach to the frame, checking that the seam where seat meets back panel sits flush without gapping.
Materials-wise, seat rebuilds typically need denser foam than the back, replacement webbing if the original has stretched, and matching welt cord carried over from your back panel work. If your seat has visible tufting or buttons, tackle that after the foam is set but before final fabric attachment.
Pro Tip: Aim for a firmer seat and a slightly softer back. A seat that’s too soft feels collapsed under weight, while a back that’s too firm looks stiff and undermines the whole point of channel tufting, which is a soft, rounded profile.
Why Do Channels Pucker or Widen Unevenly?
Puckering along a channel almost always traces back to one of two causes: uneven stuffing density or a stapling tension mismatch between adjacent channels. If one channel got more fill than its neighbor, the fabric over the fuller channel will pull tight while the thinner one goes slack, creating visible ripples at the seam line.
Channels that widen near the base rather than staying consistent top to bottom usually mean the foam groove wasn’t cut to a consistent depth, or the fabric wasn’t stapled at the true bottom of the groove. Re-marking the foam and re-cutting the groove to a uniform depth fixes this permanently. Re-stapling at the correct groove base fixes it for the current build.
Common fixes, ranked by how much rework they require:
- Minor puckers: Use a regulator needle to redistribute fill through the seam without opening it.
- Uneven channel widths: Remove staples on the affected section only, re-tension by hand, and re-staple at the groove base.
- Bulk at seam intersections: Trim seam allowances down to 1/4 inch at the thickest junctions and add a small reinforcement stitch to prevent fraying.
- Seam splitting under tension: This usually means the original seam allowance was too narrow for the fabric weight. Re-sew with a wider allowance and heavier thread.
Pro Tip: If a fix takes less than 15 minutes and doesn’t require removing more than one channel’s worth of staples, it’s a cosmetic fix. If you’re looking at removing three or more channels to correct a width problem, stop patching and re-sew the panel section. Patched repairs on channel backs are visible from across a room.
What Does a Channel Back Chair Reupholstery Project Cost?
A DIY channel back reupholstery project on a standard club or wing chair typically runs $150 to $350 in materials, depending on fabric grade and channel count. Professional reupholstery for the same chair, labor included, commonly runs $600 to $1,200 or more, since channel work takes significantly longer than flat-panel upholstery for a shop to bill hourly.
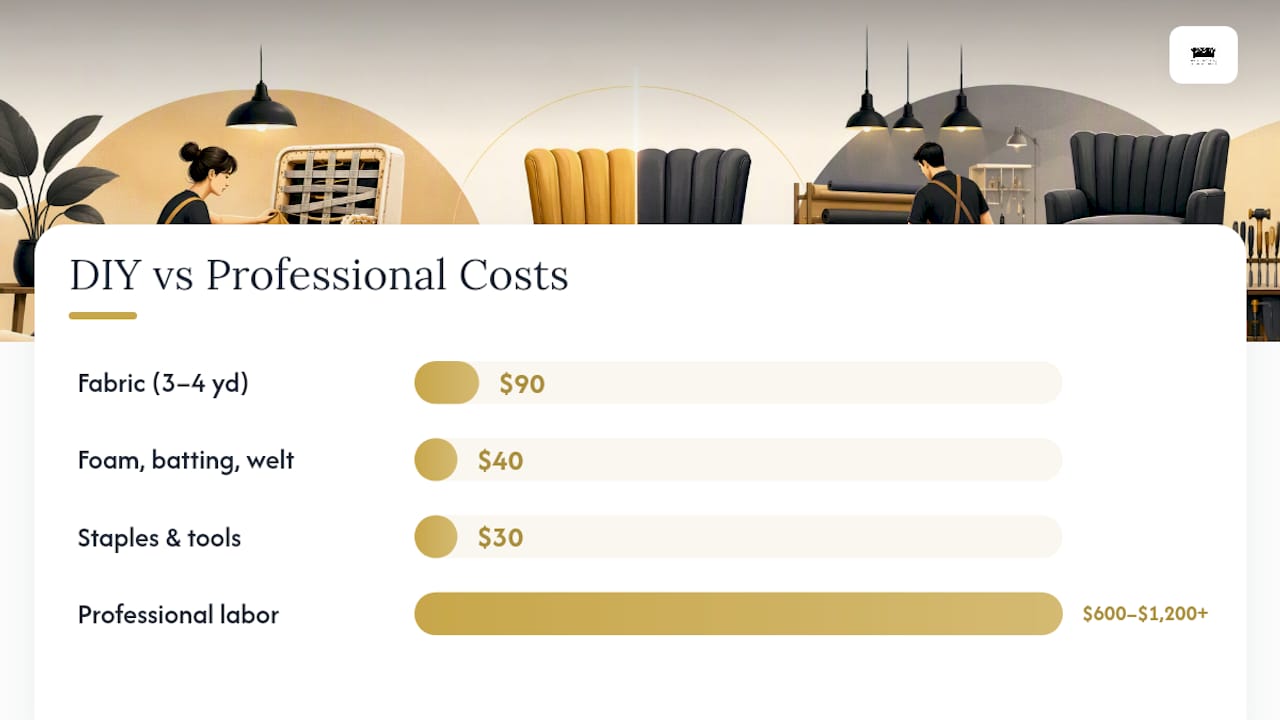
| Cost Category | DIY Estimate | Professional Estimate |
|---|---|---|
| Fabric (3–4 yards, mid-grade) | $90 | Included in labor quote |
| Foam, batting, welt, thread | $40 | Included in labor quote |
| Staples and small tools (one-time) | $30 | Not applicable |
| Labor (your time, multiple hours) | Unpaid | $600–$1,200+ |
If you already have basic tools, DIY is almost always the cheaper route. If the chair has structural frame damage, a badly warped curve, or springs that need retying, professional help is worth pricing out. Complex curves and structural repairs push the skill requirement well past what a first channel-back project should tackle.
The “is it worth it” question usually comes down to three factors: sentimental value of the piece, the quality of the underlying frame, and whether you’d actually replace the chair otherwise. A solid hardwood frame with a channel back you love is almost always worth the fabric and time investment, even if the math doesn’t beat buying new.
Where Can You Find Patterns and Video Tutorials?
Rowley Company publishes a downloadable pattern PDF walking through both the sewn-channel and foam-channel methods with small-step diagrams, a solid reference if you want a visual sequence to follow alongside this guide. Sailrite produces detailed video tutorials covering heavy-duty sewing techniques that translate directly to channel work, useful if you’re still building sewing machine confidence.
When you’re evaluating any pattern PDF, check for three things before relying on it: whether it’s drawn to scale or needs manual resizing, whether seam allowances are marked or assumed, and whether the channel templates account for a curved back or only a flat one. A flat template forced onto a curved frame will bunch at the curve unless you adjust it manually.
For materials, prioritize a performance weave with reasonable abrasion resistance if the chair sees daily use, and always check nap direction before cutting multiple channel strips from patterned or pile fabric.
- Common Upholstery Supply Materials is a good starting point for sourcing batting, foam, and fasteners.
What Skills Should You Practice Before Tackling a Full Chair?
Four skills determine whether your first channel back project goes smoothly: sewing long, straight seams without drift, marking foam accurately with a chalk wheel, pulling fabric from the center out with even tension, and stapling consistently at the base of a groove rather than the walls.
Small practice projects build these habits without the pressure of a full chair. A bench cushion strip or a narrow headboard panel gives you a chance to sew a real channel, stuff it, and staple it under actual tension, at a fraction of the size and stakes, an approach echoed in Bright Green Door’s own channel tufting project.
Before attempting the full chair, work through these Weloveupholstery guides:
- How to Reupholster a Chair: A Complete Beginner Guide covers foundational removal and stapling techniques you’ll use constantly.
- How to Reupholster a Dining Chair Seat is a smaller, lower-stakes project that builds seat-specific skills you’ll need for the seat portion of a channel back chair.
- How to Reupholster a Wingback Chair is worth reading if your channel back has a curved frame, since curved backs need extra pattern adjustment.
Pro Tip: Finish at least one small practice piece, start to finish, staples and all, before you touch your actual chair. The habits you build on a $10 remnant save you from ruining $150 of good fabric.
How Do You Remove and Save Old Padding Without Wasting It?
Old padding is often more useful than DIYers expect, so don’t strip it out and toss it before checking its condition. As you remove each channel, pull the batting and stuffing free carefully rather than tearing it, and set it aside sorted by channel position, mirroring the labeling system you used for the fabric panels.
Cotton and wool felt padding from older chairs, pre-1980s in particular, often holds up better than you’d expect and can be reused as an underlayer beneath new batting, adding density without adding cost. Polyester fiberfill degrades faster and typically needs full replacement, especially if it’s compressed flat or has an odor from age and moisture exposure.
Check foam separately from soft padding. Foam that crumbles, yellows heavily, or leaves a fine dust on your hands has broken down chemically and needs replacing regardless of how it looks from the outside. Foam that’s still resilient, springs back within a second or two when pressed, can often be reused if you’re only changing the fabric and not adjusting channel width or depth.
If you’re reusing any original padding, store it in labeled bags matching your channel numbering system until you’re ready for the stuffing step. Mixing up which pad came from which channel undoes the careful measurement work you did during disassembly, and you’ll end up eyeballing fit again instead of matching it precisely.
What Fabric Works Best for a Channel Back Chair?
Fabric choice for channel tufting matters more than for flat-panel upholstery, because every channel puts the material under sustained curved tension, and some fabrics handle that better than others. Tightly woven performance fabrics, like polyester and nylon blend weaves rated for heavy household use, hold their shape across a channel’s curve without stretching unevenly or showing stress lines at the seams.
Velvet is the classic choice for channel backs because its pile hides minor stitching irregularities and catches light beautifully across the ridges. It comes with a real tradeoff, though: nap direction has to match across every single channel strip, or you’ll see color variation as light hits each piece differently. Cutting velvet for a multi-channel project takes longer and wastes more fabric than a plain weave, since every strip needs to run the same direction relative to the roll.
Linen and linen-blend fabrics look elegant on channel backs but stretch more under tension than a tighter weave, which can lead to sagging in high-use chairs within a year or two. If you’re set on linen, choose a heavier weight, at least mid-weight upholstery grade, and expect to re-tension the panel sooner than you would with a performance weave.
For a chair that sees daily use, prioritize abrasion resistance and a tight weave over pure aesthetics. The Weloveupholstery types of dining chair upholstery guide breaks down durability ratings across common fabric categories if you want a deeper comparison before you buy.
Do You Need to Disassemble the Chair Frame First?
Most channel back projects don’t require full frame disassembly, but arms, seat decks, or removable back panels sometimes need to come off to access stapling points cleanly. If your chair has a separate seat cushion, remove it entirely before starting on the back so you’re not working around it.
If you do need to remove arm panels or a detachable back frame section, label every screw, bolt, and bracket in a small labeled bag as you go, matching each to its location with masking tape directly on the wood. It sounds excessive until you’re staring at four identical-looking brackets three days later trying to remember which one goes where.
Reassembly follows removal in reverse, but check two things before final tightening: that fabric edges are fully tucked and stapled before you reattach any panel that will cover them, and that all structural screws are seated fully before you apply upholstery pressure against that joint. A loose screw under fabric tension will work itself looser over time and eventually show as a wobble in the finished chair.
If your chair needed webbing or spring repair as part of the initial assessment, complete that structural work fully before reattaching any panels. Trapping a webbing problem behind finished upholstery means a full teardown to fix it later. For chairs with sagging seat decks discovered during your initial inspection, the Weloveupholstery seat reinforcement guide covers webbing and spring repair before you move on to final fabric attachment.
What Safety Precautions Should You Take?
Staple guns, even manual ones, are the most common source of injury in home upholstery projects, and an electric or pneumatic model raises the stakes if you’re not used to the trigger sensitivity. Keep your free hand well clear of the staple path at all times, and never staple toward yourself or across your own hand to reach an awkward angle. Reposition the chair instead.
Wear safety glasses when removing old staples. They fly unpredictably when pried loose, and old, rusted staples occasionally shatter rather than bending cleanly. Keep a magnetic sweeper or a small dish nearby to collect removed staples immediately rather than letting them scatter across your workspace, where bare feet or curious pets can find them.
Foam cutting with an electric knife or long serrated blade needs a stable, clamped work surface. Never cut foam freehand while holding it against your body. Ventilate your workspace if you’re using spray adhesive, since the fumes build up quickly in an enclosed garage or workshop.
Finally, take breaks. Hand and wrist fatigue from repetitive stapling and hand-stitching is real, and a tired hand is when stapling accidents and sewing machine slips happen. A 10 minute break every hour keeps your precision consistent through the later, more detail-heavy stages of the project.
What I’ve Learned From Years of Fixing Other People’s Channel Backs
The single habit that prevents most channel back disasters isn’t a sewing technique at all: it’s testing your channel spacing on a paper mockup before you cut a single piece of fabric. I’ve seen more good fabric ruined by skipping that ten-minute step than by any actual sewing mistake.
Patience is the real material list item nobody mentions. Test every tension adjustment on a fabric scrap first, and if a channel comes out wrong late in the day, walk away rather than trying to fix it while frustrated. Tension errors fixed under frustration tend to create a second error while correcting the first.
One project stands out: a client’s curved wingback where the original channels had drifted nearly two inches by the time they reached the bottom rail, likely from decades of the previous stapling giving way. Re-marking the foam from the center channel outward, rather than trying to follow the old drifted lines, fixed the whole back in one pass. Sometimes starting over from a clean mark is faster than trying to rescue what’s already there.
Let Weloveupholstery Guides Take the Guesswork Out of Your Next Project
Channel tufting punishes improvisation, so having a tested sequence to follow, rather than piecing one together from scattered forum posts, is what actually saves fabric and hours. Weloveupholstery’s tutorials are built the same way this guide is: mark first, work center-out, and check your work at every stage instead of only at the end.

If you’re still finalizing your materials list, the Upholstery Tools Checklist for DIY Beginners breaks down exactly what to buy versus what to rent for a one-off project, which matters most for a big-ticket item like an electric staple gun. And before you order fabric, run your numbers past the Upholstery Fabric Guide so your yardage order accounts for nap direction and the tufting buffer this project demands.
Browse the full DIY Guides archive for related projects, including seat rebuilds and curved-back techniques, and start with a small practice channel before you commit your good fabric to the real chair.
Frequently Asked Questions
How long does it take to reupholster a channel back chair?
Reupholstery of a standard club or wing chair generally requires multiple sessions over several days rather than one sitting. Curved backs and higher channel counts push toward the longer end of that range.
Can I reupholster a channel back chair without a sewing machine?
It’s difficult. The sewn-channel method genuinely needs a machine capable of handling multiple heavy fabric layers. The foam-channel method reduces sewing needs somewhat, but you’ll still need a machine for welt cord and edge finishing.
What’s the difference between channel tufting and diamond tufting?
Channel tufting creates parallel vertical or horizontal ridges, while diamond tufting uses buttons pulled at intersecting points to create a diamond grid pattern. Channel backs are generally faster to execute since there’s no button placement to calculate.
How many channels should a chair back have?
Standard club and wing chairs typically have multiple channels spaced proportionally across the back, with numbers varying by chair size and desired aesthetics, though this depends on your desired visual effect. Narrower channels create a taller, slimmer look; wider channels create a broader, lower profile.
Is channel back chair reupholstery cheaper than hiring a professional?
Usually, yes. DIY materials typically run $150 to $350, compared to $600 to $1,200 or more for professional labor on the same chair. The tradeoff is your own time and the learning curve on your first attempt.
Sources
- Tufted and Channel Back Chairs: Upholstering (Cooperative Extension South Dakota State University)
- DIY Vertical Channel Tufting Reading Nook – Bright Green Door
- Channel Tufting Upholstery Guide: Professional Technique | StitchDesk