Yes, most dining chair seats can be reupholstered at home in an afternoon with basic tools. A single seat takes about 45 minutes to two hours the first time you try it, and a full set of six runs several hours once you find a rhythm. The result: a snug new fabric surface, crisp corners, and a chair that looks bought rather than patched, provided you have a staple gun, a tack puller, and replacement foam on hand.
TL;DR:
- Using an electric or pneumatic staple gun with 3/8 to 1/2-inch staples speeds up the process and reduces hand fatigue for multiple chairs.
- Fabrics rated above 15,000 double rubs are recommended for durability in high-use dining chair applications, especially with kids or frequent guests.
- Batch upholstering all seats in sequence rather than finishing one at a time improves consistency and reduces total project time.
- Replacing old foam is essential if it is flattened, crumbly, or yellowed, with a foam cut to the same size as the seat for a professional finish.
- Proper tension control, starting stapling from the center outward, and careful corner folding are key to achieving a professional look.
Table of Contents
- What Tools and Materials Do You Need to Reupholster a Dining Chair?
- How Do You Choose the Right Fabric and Calculate Yardage?
- What Is the Step-by-Step Process to Reupholster a Dining Chair?
- Common Mistakes and How to Fix Them
- Is It Cheaper to DIY or Hire a Professional?
- Who’s Behind This Guide and Where to Go Next
- What the Data Actually Tells Beginners to Prioritize
- Get the Full Step-by-Step Checklist and Fabric Picks
- Sources
What Tools and Materials Do You Need to Reupholster a Dining Chair?
Before you touch a single staple, lay everything out on the workbench. Nothing kills momentum faster than driving to the hardware store mid-project because you’re missing the one tool that actually matters.
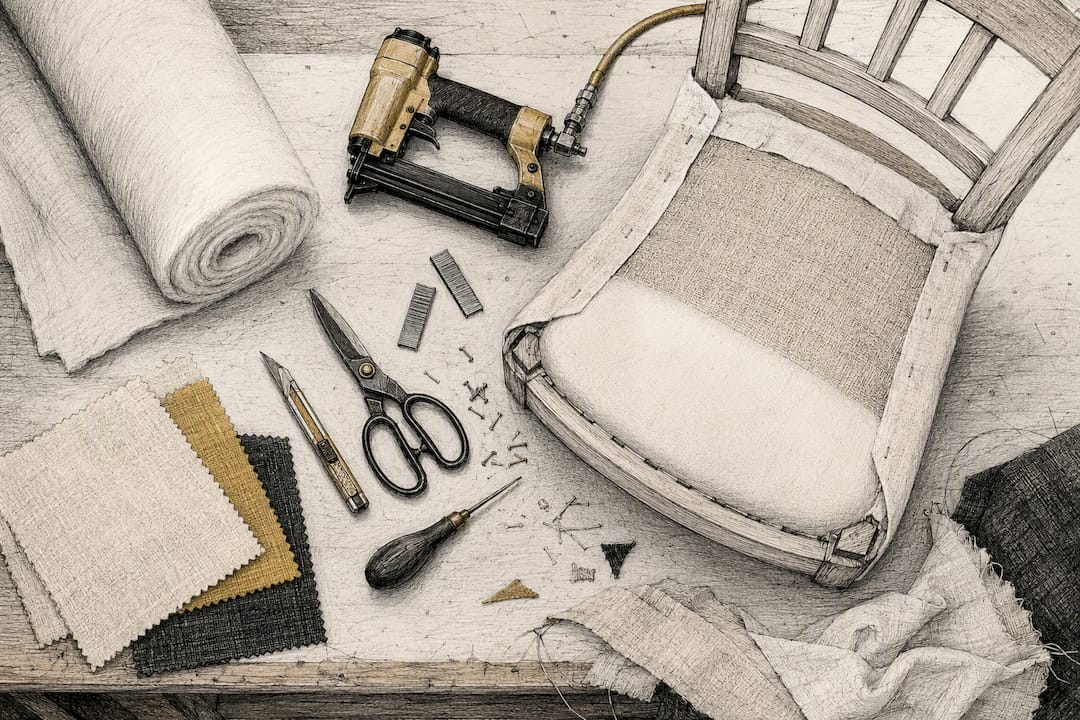
Your staple gun is the backbone of the job. A manual staple gun works fine for one or two chairs, but if you’re doing a full dining set, an electric or pneumatic staple gun saves your hand and gives more consistent depth. Load it with 3/8-inch to 1/2-inch upholstery staples; anything longer risks poking through thin plywood seat bases.
Here’s the full list you’ll want within reach:
- Staple gun (manual for occasional use, electric for sets of four or more) plus a box of 3/8 to 1/2-inch staples
- Staple remover or flathead tack puller and needle-nose pliers for the staples that won’t cooperate
- Screwdriver set to detach the seat from the frame (most dining chairs use four screws driven up through the corner blocks)
- Foam cut to seat size, in a firmness rated for seating rather than cushioning
- Electric carving knife for cutting foam cleanly, a trick professional upholsterers rely on because scissors and serrated knives tend to tear and compress the edge
- Cotton batting to smooth the foam’s edges and add a soft finish under the fabric
- Dust cover fabric (a lightweight black cambric) for the underside, plus spray adhesive to tack foam to the board
- Fabric shears, a staple gun oil or lubricant, and optionally welting cord for a tailored edge
Wear safety glasses when pulling staples; they fly at odd angles and have a habit of finding eyes. If you’re using a power staple gun, keep fingers well clear of the platen.
Pro Tip: Keep a small dish nearby for spent staples and screws as you strip each chair. Losing track of hardware is the most common reason a “quick project” turns into a two-day scramble.
How Do You Choose the Right Fabric and Calculate Yardage?
Fabric choice makes or breaks a dining chair project, because these seats take more daily friction than almost any other upholstered surface in the house. Look for a durability rating in double rubs, the industry test for abrasion resistance. Anything below 9,000 double rubs is really meant for decorative pillows, not chairs; 15,000 or higher is a safer bet for households with kids or frequent guests.

Woven fabrics with a tight weave (think cotton duck, performance polyester blends, or heavier linens) tend to outlast loosely woven decorative prints. Vinyl and faux leather resist spills better than any woven fabric but show every scratch differently, which matters if you have pets clawing at chair legs.
Measuring is simple: lay a tape measure across the seat front to back and side to side, then add 4 to 6 inches on every edge so you have enough to wrap and staple underneath. For most dining chairs, that works out to about half a yard to a full yard of fabric per seat, depending on how large the seat pan is and whether you’re matching a pattern across a set.
- Measure seat length and width, then add a 4 to 6-inch wrap allowance on all sides
- Budget roughly 0.5 to 1 yard of fabric per chair for standard seat pans
- Choose foam of moderate thickness for dining seats to avoid the seat being too tall to tuck under the table
- Only re-cover over the old fabric if the foam underneath is still firm and not overly thick
Whether you can skip stripping the chair down to bare wood depends entirely on what’s already there. Re-covering over existing fabric saves real time, but it only works cleanly when the old padding hasn’t flattened or gone lumpy. If the original fabric is heavily soiled or the padding underneath has doubled up over the years, strip it back to the board instead of stacking new material on top of old.
A quick statistic worth knowing: professional dining chair reupholstery runs $150 to $400 per chair, so getting the fabric choice right the first time is worth the extra ten minutes at the counter.
For a deeper breakdown of fiber types and cleanability, Weloveupholstery’s upholstery fabric guide walks through which weaves hold up best under a table full of elbows.
What Is the Step-by-Step Process to Reupholster a Dining Chair?
If you’re working through a full set, stage the teardown before you touch any fabric. Pull every seat off its frame, strip all the old staples, and line up the bare seat boards in a row. Then cut your foam and fabric panels in one batch. Upholstering all six seats in sequence, rather than finishing one completely before starting the next, is the single biggest time-saver experienced shops rely on, and it keeps your technique consistent across the set instead of drifting chair to chair.
Here’s the sequence that works whether you’re doing one chair or eight:
-
Remove the seat from the frame. Flip the chair over and unscrew the corner brackets holding the seat board in place. Set screws aside in a labeled dish; you’ll need the exact same holes later.
-
Strip the old fabric and staples. Pull the fabric off, then work through every staple with your remover and pliers. Go slow here. Rushed staple removal is where plywood seat boards crack or splinter.
-
Inspect and replace the foam. Press on the old foam. If it’s flattened, crumbly, or yellowed, cut it away and replace it. Trace the seat board onto your new foam and cut with the electric carving knife, which glides through cleanly where scissors bog down and compress the edge.
-
Layer batting, then center your fabric. Lay a piece of batting over the foam and staple it loosely underneath, trimming the excess. Then position your fabric right side up, centered over the seat, checking that any pattern lines up straight before a single staple goes in.
-
Staple from the center outward. Start with one staple at the center of the back edge, then one at the center of the front, pulling the fabric taut but not stretched. Move to the center of each side next. This center-first approach, a technique beginner tutorials consistently point to, keeps the fabric from bunching or drifting off-grain as you work outward. Space remaining staples about an inch apart, working toward the corners but stopping an inch or two short on each side.
-
Handle the corners. Square corners get a mitered fold: pull the fabric tight, fold one side flat like wrapping a gift box, then fold the other side over it and staple. Rounded corners take a series of small, even pleats instead, tucked and stapled one at a time until the front looks smooth. If your seat has a notch for a leg post, snip a relief cut toward the post, stopping about a quarter inch short so the fabric folds cleanly without tearing.
-
Trim, cover, and reattach. Cut away excess fabric bulk, especially at the corners, then staple a dust cover over the raw underside for a finished look. Add welting along the front edge if you want a more tailored appearance. Screw the seat back onto the frame using the same holes you started with.
Pro Tip: Leave a few staples only half-driven as you work each side, so you can pull the fabric back and adjust tension before committing. Fully seated staples are a pain to remove without gouging the wood.
Common Mistakes and How to Fix Them
Even careful first-timers hit the same handful of snags. Knowing the fix ahead of time saves you from tearing a seat apart twice.
Broken staples that leave a stub behind are the most common frustration. Rather than digging at it with the tack puller and risking a gouge in the plywood, use needle-nose pliers to grip the stub close to the surface and rock it side to side until it lifts free.
Puckers near the corners usually mean the fabric wasn’t pulled evenly before stapling. A very minor pucker can sometimes be smoothed by hand once the staples are in, but anything visible from three feet away means pulling those staples and restapling with more even tension.
- If the seat won’t sit flush in the frame anymore, you’ve likely stacked too many layers of batting; trim it down rather than forcing the seat into place
- For patterned fabric across a set, mark the exact center point on every seat board before stapling so the design lines up chair to chair
- Batch your cutting (all foam, then all fabric, then all upholstering) to shave real time off each additional chair once you’ve got the first one dialed in
Pro Tip: Once your seats are done, a fabric protector spray extends the life of the finish considerably. Cleaning guidance from iCleanse covers how to spot-treat spills without damaging the weave.
Is It Cheaper to DIY or Hire a Professional?
Materials for one dining chair seat typically run $20 to $60, covering foam, batting, staples, and mid-range fabric. A set of six lands somewhere between $120 and $360, depending on fabric quality. A professional quote is $150 to $400 per chair for the same job.
Time-wise, expect 45 minutes to two hours for your first seat. Once you’ve got the sequence memorized, production shops complete a seat in 15 to 20 minutes, and that speed shows up fast once you’re on chair four or five of a set.
Run through this before deciding:
- Is the frame structurally sound, or does it need repair beyond the fabric?
- Do you have an afternoon free, or is this squeezed between other commitments?
- Are you doing one chair or a full set where batching pays off?
- Does the fabric have a pattern that needs careful matching across multiple seats?
If the frame is solid and you’ve got a free afternoon, DIY wins on cost every time.
Who’s Behind This Guide and Where to Go Next
This guide reflects the hands-on approach Weloveupholstery takes with every tutorial: written by practitioners who’ve pulled their share of stubborn staples, not generic advice repackaged from someone else’s blog post. If a single chair seat felt manageable, the same center-first stapling sequence and corner techniques apply to bigger projects.
For related reading, check the beginner’s guide to reupholstering a chair for extra photos and templates, browse the full reupholstery archives for more chair types, or grab the upholstery tools checklist to make sure your kit is complete before you start.
What the Data Actually Tells Beginners to Prioritize
Most tutorials on this topic bury the two details that matter most: tension control and batch order. Everyone talks about staple guns and fabric choice, but almost nobody explains that the center-first stapling method exists specifically to stop fabric from drifting off-grain, which is the single most common reason a finished seat looks “homemade” instead of professional.
The conventional advice to “finish one chair completely before starting the next” is actually backwards for anyone doing more than two seats. Tearing down every chair first, then cutting every panel, then upholstering in sequence produces more consistent results and takes noticeably less time by the third or fourth chair. Beginners skip this because it feels slower at the start. It isn’t.
If you take one thing from this guide, prioritize the foam. A tired, flattened cushion under gorgeous new fabric still looks and feels tired. Spend the extra few dollars on foam before you spend it on fabric with a fancier pattern.
— Dustin
Get the Full Step-by-Step Checklist and Fabric Picks
Reupholstering one seat teaches you the sequence. Doing it right the first time, without a mid-project trip back to the store, comes down to having the fabric math and tool list dialed in before you cut anything. Weloveupholstery’s step-by-step dining chair seat guide walks through the exact stapling order and corner folds with close-up photos at each stage, and the upholstery fabric guide breaks down which weaves hold up under daily use so you’re not guessing at the fabric counter.

Some of the tools and materials linked throughout these guides are affiliate links, meaning Weloveupholstery may earn a small commission if you buy through them, at no extra cost to you. It’s how the site keeps producing free, practitioner-written tutorials instead of paywalling the good stuff. If you’re gathering supplies for a full set, the DIY guides archive has downloadable checklists that make batch shopping faster. Start with the fabric guide, confirm your yardage, then work through the seat tutorial chair by chair.
Sources
For a different beginner-friendly walkthrough, Apartment Therapy’s chair reupholstery guide breaks the process into short steps. BobVila’s cost breakdown is useful for weighing DIY against a professional quote. For the foam-cutting technique itself, The Homes I Have Made demonstrates the electric carving knife method in detail.
- How to reupholster a chair for total beginners | Apartment Therapy
- How to recover a chair | BobVila
- How to Reupholster Dining Chairs | StitchDesk
- How to cut upholstery foam | The Homes I Have Made