Your leather sofa looked sharp when you bought it. Now it’s cracked, faded, or just plain tired. Before you write it off, consider this: to reupholster a leather sofa is one of the most rewarding furniture projects a homeowner can take on. The result is a piece that looks custom-made, lasts another decade, and costs a fraction of buying new. This guide walks you through every stage, from assessing your sofa’s condition to the final protective finish, with the kind of detail that actually gets the job done.
Table of Contents
- Key takeaways
- What you need to reupholster a leather sofa
- Removing old upholstery and prepping the frame
- Creating patterns and cutting leather
- Attaching leather panels and finishing the sofa
- Common mistakes and how to care for your sofa after
- My honest take on leather sofa reupholstery
- Ready to take your sofa from worn to stunning?
- FAQ
Key takeaways
| Point | Details |
|---|---|
| Assess before you buy | Check the frame, springs, and leather damage zones before purchasing any materials. |
| Patterning is non-negotiable | Use original upholstery as templates because leather stretches far less than fabric. |
| Budget realistically | DIY material costs typically start around $700 for a standard sofa, not counting tools. |
| Thin dye coats win | Apply leather dye in multiple thin layers and allow 24 to 48 hours of curing between sessions. |
| Know when to call a pro | Widespread frame damage or complex tufting may be worth outsourcing to save time and money. |
What you need to reupholster a leather sofa
Getting the materials right before you start is the difference between a smooth project and a frustrating one. Leather reupholstery requires a specific set of tools that a standard fabric job does not always demand.
Here is what you need to gather:
- Upholstery leather or faux leather (measured in square footage based on your sofa’s panels)
- Heavy-duty staple gun with 3/8 inch and 1/2 inch staples
- Seam ripper and flathead screwdrivers for removing old upholstery
- Needle-nose pliers for pulling staples cleanly
- Industrial sewing machine capable of handling leather thickness (home machines often cannot)
- Leather cutting tools such as a rotary cutter and sharp shears
- Contact cement and upholstery adhesive
- Foam padding if cushions need replacing
- Leather dye, preparer, and finisher if recoloring
Pro Tip: Before buying leather, add 15 to 20 percent to your measured square footage. Leather hides have natural imperfections, and you will need extra for pattern matching and mistakes.
Assessing your sofa’s condition
Not every worn sofa is worth a full reupholstery. Knowing when to repair vs. reupholster saves you real time and money. Focus your inspection on the high-use zones: seat cushions, armrests, and the lower back panel. These areas show wear first and fail fastest.
Check the frame by pressing firmly on the arms and back. No flex or wobble means a solid foundation. Soft springs can be re-tied, but a cracked wooden frame needs repair before any leather goes on. Upholstery costs depend heavily on frame condition, design complexity, and needed repairs, so document everything before you price out materials.
| Sofa size | Estimated DIY material cost | Professional labor cost |
|---|---|---|
| Loveseat | $400 to $700 | $700 to $1,500 |
| Standard 3-seat sofa | $700 to $1,200 | $900 to $2,500 |
| Sectional | $1,500 to $2,500 | $2,000 to $4,500+ |
For reference, leather reupholstery costs break into four bands: under $1,000 for basic DIY prep work, $1,000 to $2,500 for mid-range projects, $2,500 to $4,000 for premium leather and complex designs, and $4,000 and above for luxury custom work.
Removing old upholstery and prepping the frame
This stage is slow, methodical work. Rushing it leads to damaged frames and missing reference points for your new leather panels.
- Remove all cushions and set them aside. Photograph every angle of the sofa before touching anything else. These photos are your blueprint.
- Locate the dust cover on the sofa’s underside and remove it carefully. This reveals the staple pattern and construction method.
- Use a flathead screwdriver and pliers to remove staples one by one. Work from the bottom up and from the back toward the front.
- Peel each panel off slowly and keep them intact. These become your cutting templates, so do not tear or stretch them during removal.
- Label each panel with masking tape and a marker as you go: left arm, right arm, seat front, seat back, and so on.
- Inspect the frame and springs once everything is stripped. Re-tie any loose springs with jute twine and repair any cracked wood with wood glue and clamps.
- Clean the frame with a dry cloth to remove dust, old foam debris, and staple rust. A clean surface means better adhesion for your new materials.
Pro Tip: Take a short video walkthrough of your sofa before disassembly. Video captures depth and layering that photos sometimes miss, especially around arm joints and back corners.
Safety matters here too. Wear heavy gloves when pulling staples, as snapped staples can fly. Work in a well-ventilated space if you are using adhesives or cleaning solvents on the frame.
Creating patterns and cutting leather
This is where most DIY projects go wrong. Leather behaves very differently from fabric. It has far less stretch, which means you cannot rely on pulling and tugging to make a panel fit. Precise patterning using your original upholstery pieces as templates is the only reliable method.
Lay each removed panel flat on your new leather hide, trace around it with chalk or a silver pen, and add a 1.5 inch seam allowance on all sides. This extra margin gives you room to staple and adjust without running short.
Key cutting and sewing guidelines:
- Always cut leather on a flat, hard surface. A rotary cutter with a fresh blade gives the cleanest edge.
- Never use pins to hold leather panels together. Pin holes are permanent. Use binder clips or leather clamps instead.
- Use a leather needle in your sewing machine and set a longer stitch length. Short stitches weaken leather by perforating it too densely, which causes tearing over time.
- Reinforce seams on high-stress areas like the seat front and arm corners with a second row of stitching or copper rivets.
- Skive (thin) thick leather edges before sewing to reduce bulk at seams. A leather skiver tool handles this quickly.
Pro Tip: If your sofa has tufting, similar to what you would find on a reupholster bench with tufting project, mark the button positions on your template before cutting. Tufting requires pre-drilled holes and a long upholstery needle, and getting the spacing wrong is nearly impossible to fix after the leather is attached.
The same patterning discipline applies whether you are working on a full sofa or a smaller project like a reupholster accent chair cushion or a reupholster slipper chair seat. Leather does not forgive guesswork.
| Leather type | Stretch level | Best use case |
|---|---|---|
| Full-grain leather | Very low | High-end sofas, long-term durability |
| Top-grain leather | Low | Standard sofas, good balance of cost and quality |
| Bonded leather | Moderate | Budget projects, shorter lifespan |
| Faux leather (PU) | Moderate to high | DIY-friendly, forgiving for beginners |
You can find a detailed breakdown of upholstery material options at Weloveupholstery to help you choose the right leather type for your project and budget.
Attaching leather panels and finishing the sofa
With your panels cut and sewn, you are ready to put the sofa back together. Work from the largest panels first: the seat deck, then the back, then the arms.
- Lay the seat panel over the cushion platform and center it carefully. Pull it taut from front to back before stapling.
- Staple the center back first, then the center front, then work outward toward the corners. This prevents wrinkles from locking in at one side.
- Fold corners cleanly by cutting a small notch in the leather at each corner point, then folding the flaps neatly before stapling. Think of it like wrapping a gift box.
- Attach arm panels next, pulling the leather firmly over the arm foam and stapling to the underside of the frame. Avoid over-stretching, which causes sagging later.
- Attach the back panel last, working from the center outward on all four sides.
- Reattach cushions by stapling or using contact cement to secure the leather wrap, then zip or hand-stitch any cushion covers closed.
- Apply a leather finisher once everything is attached. This seals the surface and protects against moisture, UV, and daily wear.
Pro Tip: If you are recoloring the leather as part of this project, apply dye before attaching panels. It is far easier to dye flat pieces than an assembled sofa. Use thin, even coats and allow 24 to 48 hours of curing between each layer to avoid blotching.
For details like piping or welting along seam edges, use a piping foot on your sewing machine and pre-cut your welt strips on the bias for flexibility around curves.
Common mistakes and how to care for your sofa after
Even careful DIYers run into problems. Knowing what to watch for helps you catch issues before they become permanent.
- Uneven dye color usually means skipped prep steps. Leather must be cleaned and deglazed before any dye is applied. Skipping cleaning is the single most common cause of blotchy results.
- Sagging panels come from relying on stretch instead of proper patterning. If a panel sags, remove it, re-cut a slightly smaller piece, and reattach with more tension.
- Weak seams that split under use signal stitching that was either too short or done with the wrong thread. Use polyester or nylon thread rated for leather, not cotton.
- Wrinkles locked in at corners happen when you staple corners before the center is secured. Always staple from the center outward.
For ongoing care after the project is done, condition your leather every three to four months with a pH-neutral leather conditioner. Keep the sofa away from direct sunlight and heat vents, which dry leather out and cause cracking. Wipe spills immediately with a dry cloth, never a wet one.
If you are ever unsure whether a problem is fixable at home, a professional assessment is worth the cost. Catching a failing seam early is far cheaper than re-doing an entire panel. For homeowners in urban areas, services like furniture reupholstery chicago il providers offer consultations that can help you decide your next move.
You can also read more about assessing furniture repair value before committing to a full redo.
My honest take on leather sofa reupholstery
I have seen homeowners tackle this project with zero upholstery experience and pull it off beautifully. I have also seen experienced sewers underestimate leather and end up frustrated. The difference is almost always preparation, not skill.
What I have learned is that people consistently underestimate two things: the time it takes to remove old upholstery cleanly, and the importance of the right sewing machine. A home machine rated for denim will struggle with thick leather. Renting or borrowing an industrial machine for a weekend changes everything.
The other thing I want to be direct about is this: leather reupholstery is genuinely satisfying in a way that smaller projects like a reupholster rocking chair seat or a reupholster barrel chair are not. The scale of a sofa forces you to develop real technique. By the time you finish, you will understand upholstery in a way that no tutorial can fully teach. That knowledge transfers directly to future projects, whether that is a reupholster club chair steps walkthrough or tackling a reupholster dining bench seat.
My advice is to budget more time than you think you need, buy slightly more leather than you think you need, and do not skip the finishing coat. The finisher is what separates a sofa that looks great for a year from one that holds up for ten.
— Dustin
Ready to take your sofa from worn to stunning?
At Weloveupholstery, we have spent years helping homeowners navigate exactly this kind of project. Whether you are mid-project and stuck on a seam issue or just starting to plan, our resources are built for real DIYers working on real furniture.

Check out our guide on fixing upholstery seams if you run into splitting or weak stitching during your build. It covers the exact techniques that make the difference between a seam that holds and one that fails under daily use. And if you want to see the full range of support available, from material sourcing to professional repair guidance, visit our services page to explore what Weloveupholstery offers. You do not have to figure this out alone.
FAQ
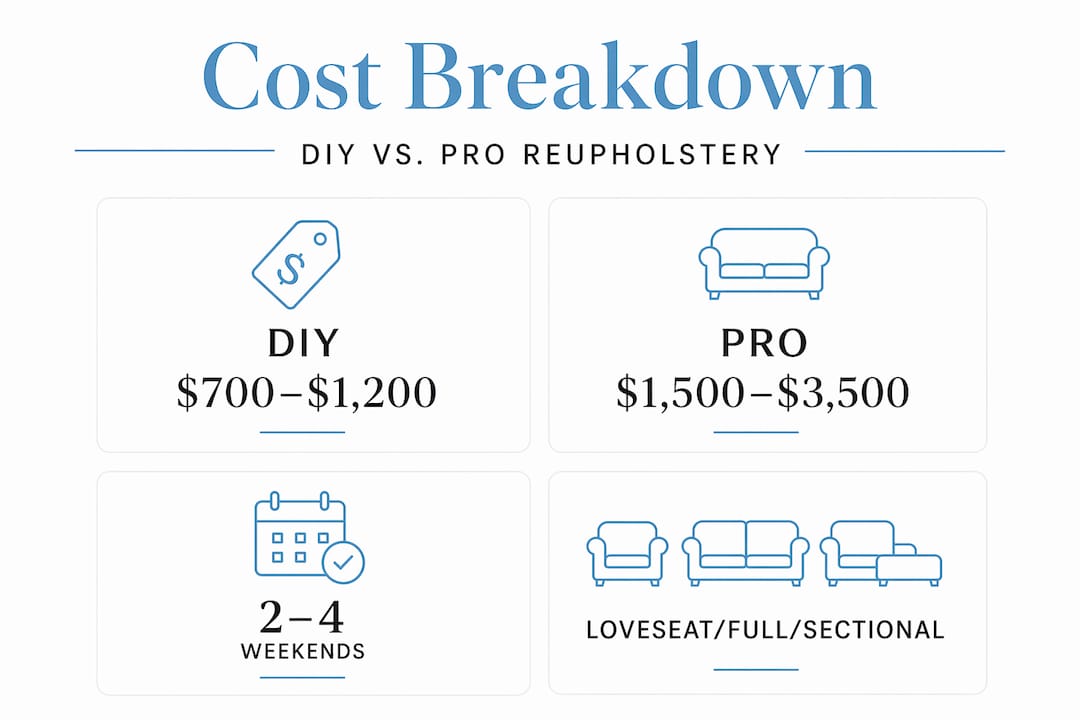
What does it cost to reupholster a leather sofa?
DIY material costs for a standard three-seat sofa typically run $700 to $1,200, while professional reupholstery ranges from $900 to $2,500 depending on leather quality and design complexity.
Can I reupholster a leather sofa myself without sewing experience?
You can handle the stapling and fitting stages without sewing experience, but panels with seams require an industrial sewing machine and leather-rated thread. Starting with a simpler project like a reupholster accent chair cushion first builds the skills you need.
How long does leather sofa reupholstery take?
A standard sofa takes most DIYers two to four full weekends, including disassembly, pattern cutting, sewing, and reassembly. Dyeing adds additional time due to required curing periods of 24 to 72 hours between coats.
Is it better to repair or fully reupholster a leather sofa?
If damage is limited to one or two zones, repair is faster and cheaper. When cracking, fading, or peeling covers most of the surface, full reupholstery delivers better longevity and a more consistent look.
What type of leather works best for DIY sofa reupholstery?
Top-grain leather offers a good balance of durability and workability for most homeowners. Faux leather (PU) is more forgiving for beginners and easier to cut and sew, though it has a shorter lifespan than genuine leather.
My Honest Take on Reupholstering Leather Sofas
Leather reupholstery is one of those projects that looks more intimidating than it is — but it also punishes mistakes more than fabric work does. Leather doesn’t forgive uneven cuts or poor tension the way a woven fabric might. You pull it wrong and you’ll see it.
That said, I’ve seen complete beginners do great work on leather sofas by slowing down and not rushing the stretching and stapling stage. The most common mistake I see is pulling the leather too tight too fast. You want even, gradual tension — work from the center out and check your surface constantly for puckering.
One thing the guides don’t always mention: old leather sofas often have foam that’s completely broken down underneath. If you’re already taking the leather off, replace the foam at the same time. It doubles the lifespan of the whole project and costs very little extra at that point.