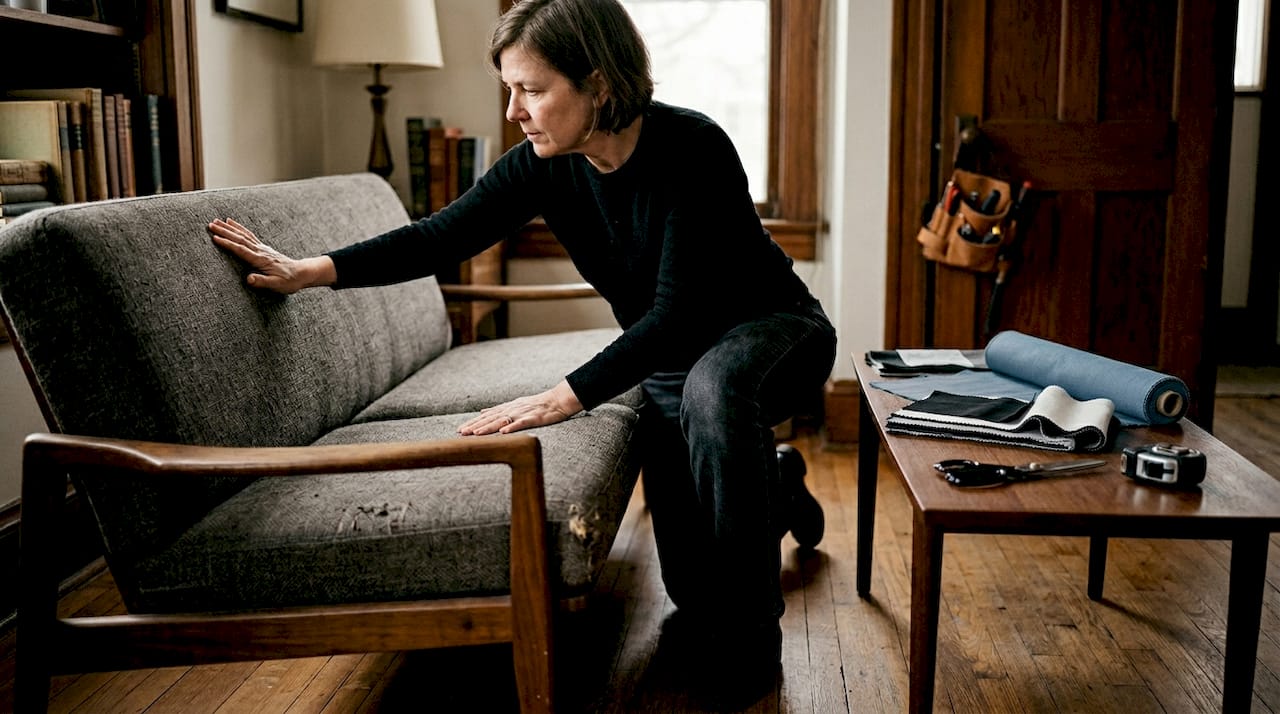
Curved sofa back reupholstery is one of those projects that stops people in their tracks. The sweeping shape looks beautiful in a room, but the moment you start thinking about fitting fabric around those arcs, the whole thing feels overwhelming. Here is the truth: curved backs are harder than straight ones, but they are absolutely manageable if you slow down, prepare properly, and respect the process. This guide covers everything from the tools you need to the finishing touches that separate a polished result from a lumpy disappointment.
Table of Contents
- Key takeaways
- Curved sofa back reupholstery: tools and prep
- Step-by-step: cutting and attaching fabric on curved backs
- Troubleshooting and finishing touches
- Cost and time: DIY vs. professional reupholstery
- My honest take on curved sofa upholstery
- Ready to take the next step?
- FAQ
Key takeaways
| Point | Details |
|---|---|
| Templates are everything | Save your old fabric panels and use them as cutting guides for new material. |
| Fabric choice changes everything | Textured fabrics like bouclé hide minor fitting errors far better than smooth weaves. |
| Hot glue is your friend | Use it to temporarily hold welting on curved channels before permanent stapling. |
| Inspect the frame first | Degraded webbing or foam will ruin new fabric no matter how well you cut it. |
| Know your budget | Professional curved sofa reupholstery can cost $3,000 or more, making DIY worth the effort. |
Curved sofa back reupholstery: tools and prep
Getting the right tools together before you touch the sofa is not optional. It is the difference between a smooth project and a frustrating one that stalls halfway through.
Tools you will need
- Electric staple gun (a manual one will tire your hand fast on curved sections)
- Staple remover and flat-head screwdriver for pulling old staples without tearing the frame
- Hot glue gun for temporary holds on welting and trim
- Curved upholstery needles for hand-stitching tight spots that a staple gun cannot reach
- Fabric scissors and rotary cutter for clean, precise cuts on curved pattern pieces
- Chalk or fabric marker for tracing templates
- Webbing stretcher if you need to replace the internal support structure
| Tool | Purpose |
|---|---|
| Electric staple gun | Attaches fabric to frame along curved edges |
| Hot glue gun | Holds welting in position temporarily |
| Curved needles | Hand-stitches inaccessible seam areas |
| Webbing stretcher | Tightens replacement webbing across the frame |
| Rotary cutter | Cuts smooth curves on fabric panels |
Choosing the right fabric
Not every fabric works on a curved back. Smooth, stiff materials like heavy linen or flat cotton canvas resist the bending required to hug a curve without puckering. Your best options are fabrics with some give or texture. Fabric textures like bouclé mask minor fitting errors better than smooth fabrics on curved surfaces, which is why designers reach for them on modern curved sofa design projects. Velvet is another strong choice because its pile compresses slightly around bends. For non-permanent refreshes, stretch-fit covers are recommended because standard slipcovers simply cannot conform to the shape.
You can find a breakdown of recommended upholstery materials on the Weloveupholstery site if you want to compare fabric grades before buying.
Evaluating your sofa before you start
Before cutting anything, check the sofa’s condition from the inside out. Press down on the seat and back. If you feel the frame or hear creaking, the webbing underneath may be compromised. Replacing degraded webbing or foam is necessary to prevent sagging and uneven fabric fit after reupholstery. Cushion inserts should also be checked. Refilling cushions and replacing covers can dramatically change a vintage sofa’s character without a full structural rebuild, so sometimes that is all you need.
Pro Tip: Before removing a single staple, photograph every panel from multiple angles and label each piece with masking tape and a marker. Accurate measurement and labeling of panels before disassembly are crucial for efficient reconstruction, and you will thank yourself when it is time to reassemble.
Step-by-step: cutting and attaching fabric on curved backs
This is where the real work happens. Curved sofas are pro-level projects because of complex patterning and fabric fitting demands, but a methodical approach makes it achievable.
- Remove the old fabric carefully. Work from the bottom up, pulling staples one at a time. Do not rip panels off. You need every piece intact.
- Use old fabric as your template. Lay each removed panel flat on your new fabric and trace around it with chalk. Old fabric used as a 3D template before removal guides the cutting of new upholstery fabric and prevents the bunching that kills most DIY curved projects. Add a half-inch seam allowance on all sides.
- Cut slowly on curves. Use a rotary cutter for concave edges and scissors for convex ones. Precision in cutting tailored fabric to hug curves is critical, and most mistakes happen at this stage.
- Attach the back panel first. Center the fabric on the back frame and place one staple in the middle of the top edge. Then staple the middle of the bottom edge. Work outward from the center on each side, pulling the fabric taut but not stretched.
- Manage curves with relief cuts. On tight inside curves, cut small notches into the seam allowance every inch or so. This releases tension and lets the fabric lie flat without puckering.
- Secure the sides last. Pull the side panels around the curved frame and staple in short intervals. Work in small sections rather than long runs to maintain even tension.
- Apply welting with hot glue first. Before stapling welting permanently, hot glue holds welting in precise position on curved channels to prevent migration during assembly. Once you confirm the alignment, go back and staple through the welting cord’s lip.
| Technique | Straight Sofa | Curved Sofa |
|---|---|---|
| Stapling direction | Straight runs, edge to edge | Center out, short intervals |
| Seam allowance | Standard half-inch | Half-inch plus relief cuts |
| Welting attachment | Staple directly | Hot glue first, then staple |
| Fabric type | Most fabrics work | Textured or stretch fabrics preferred |
| Template use | Optional | Required for accuracy |
Pro Tip: If your fabric starts to pucker on a curve, do not try to stretch it harder. Remove the staples, add more relief cuts to the seam allowance, and re-staple. Forcing fabric around a curve without relief cuts always shows in the finished piece.

Troubleshooting and finishing touches
Even experienced upholsterers hit snags on curved backs. Knowing how to read the problem saves you from ripping everything out and starting over.
Common issues and how to fix them
- Fabric buckling or waving: Usually caused by stapling in long runs without relief cuts. Remove staples in the problem area, add notches to the seam allowance, and re-attach in short sections.
- Sagging in the center of the back: This almost always points to a webbing problem underneath. Replacing substructure supports like webbing or foam is necessary if degraded to prevent sagging and uneven fabric fit. New fabric will not fix a structural problem.
- Welting that will not stay straight: Remove it, run a bead of hot glue along the channel, and press the welting in before it cools. Hold it in place for thirty seconds.
- Visible staples at the edges: Cover with gimp trim or a second layer of welting glued over the staple line.
Finishing for durability
Once the fabric is secure, run your hand over every seam and edge. Any area that feels loose or shows a gap is a future tear waiting to happen. For seam areas that need reinforcing, the Weloveupholstery guide on fixing loose upholstery seams walks through repair techniques that hold long-term.
Spray the finished upholstery with a fabric protector designed for the material type. For velvet, use a protector made specifically for pile fabrics. For bouclé, a general upholstery protector works well.
When a curved back sofa restoration feels too complex to finish cleanly, that is the right moment to call a professional. A botched finish on a quality frame costs more to fix than hiring help from the start.
Pro Tip: After completing the project, vacuum the new fabric with a soft brush attachment to remove any chalk marks, debris, or loose fibers from the cutting process. It makes a bigger difference in the final appearance than most people expect.
Cost and time: DIY vs. professional reupholstery
Let’s talk numbers, because this is where a lot of people make the wrong call.
| Factor | DIY | Professional |
|---|---|---|
| Fabric cost (average sofa) | $150–$400 | Included in service quote |
| Labor cost | Your time | $1,500–$4,500 |
| Total estimated cost | $200–$600 | $1,800–$4,500 |
| Time required | 15–30 hours | 3–7 business days |
| Risk of error | Higher | Low |
Professional reupholstery for curved or antique sofas can reach $3,000 to $4,500 due to extra labor, which makes DIY curved sofa reupholstery genuinely worth considering for anyone with patience and time. The cost of sofa reupholstery at the professional level is high precisely because curved backs take two to three times longer than straight ones.
DIY makes sense when:
- The sofa frame is in solid condition
- You have basic upholstery experience or are willing to practice on scrap fabric first
- You have 20 or more hours to invest without rushing
- The sofa has personal or monetary value worth preserving
Professional help makes more sense when the frame needs structural repair, the curves are extremely tight or compound, or the fabric you want requires specialized sewing equipment. Understanding what drives furniture repair value can help you decide whether the investment pencils out before you commit.
DIY curved sofa upholstery requires significantly more time and precision than boxy sofas, and errors often come from underestimating that complexity. Budget extra time on your first attempt. It will take longer than you think, and that is completely normal.
My honest take on curved sofa upholstery
I have seen a lot of DIYers walk into curved back sofa restoration with confidence and walk out frustrated. Not because they lacked skill, but because they underestimated one thing: patience with the template phase.
In my experience, the people who get the best results spend almost as much time on preparation as they do on the actual upholstery work. They photograph every panel. They label every piece. They dry-fit the new fabric before committing a single staple. The ones who rush that phase spend twice as long fixing mistakes later.
My other strong opinion: fabric choice matters more than technique on curved backs. I have watched average sewers produce stunning results with bouclé because the texture forgives small inconsistencies. I have also watched skilled upholsterers struggle with flat cotton on a tight curve because there was nowhere to hide the tension lines. Pick a forgiving fabric for your first attempt. Save the smooth linen for when you have done this a few times.
The last thing I will say is this: do not let a curved sofa intimidate you into buying new. Most of the degradation on older sofas happens in the cushions and fabric, not the frame. The bones are usually fine. With the right prep, the right fabric, and a willingness to work slowly, you can bring a beautiful curved sofa back to life for a fraction of replacement cost.
— Dustin
Ready to take the next step?

If you are planning a curved sofa back reupholstery project and want to make sure your seams hold up as well as your fabric choices, Weloveupholstery has the resources to get you there. Start with the detailed guide on repairing upholstery seams to understand how to finish edges cleanly and prevent future splitting. For more complex projects or custom curved pieces, the professional upholstery services at Weloveupholstery connect you with experienced craftspeople who specialize in exactly this kind of work. Whether you go DIY or bring in help, the team at Weloveupholstery is here to support the project.
FAQ
What is the hardest part of curved sofa back reupholstery?
Template accuracy is the hardest part. Cutting fabric to match complex curves without puckering requires precise templates made from the original panels, and most errors happen at this stage.
What is the best fabric for a curved sofa back?
Textured fabrics like bouclé or velvet work best because they have enough give and visual texture to accommodate curves and hide minor fitting inconsistencies better than smooth, stiff materials.
How long does DIY curved sofa reupholstery take?
Expect 15 to 30 hours for a full curved sofa back reupholstery project, significantly more than a standard boxy sofa, which typically takes 8 to 15 hours.
How much does professional curved sofa reupholstery cost?
Professional reupholstery for curved sofas typically runs $1,800 to $4,500, with complex antique or sculptural pieces reaching the higher end due to additional labor time.
Can I use a regular slipcover on a curved sofa?
Standard slipcovers do not conform well to curved backs. Stretch-fit covers designed specifically for curved shapes are the only slipcover option that works without constant readjusting.
My Honest Take on Curved Back Reupholstery
Curved backs are where a lot of DIYers hit a wall for the first time. Straight runs are forgiving — curves aren’t. The fabric wants to pucker at every corner and the stapling has to follow the curve perfectly or the whole thing looks off.
The technique that made the biggest difference in my own work was making relief cuts — small snips into the fabric allowance before stapling around a curve. Those cuts let the fabric fold cleanly without bunching. Most beginners skip this step because it feels counterintuitive to cut into the fabric you’re working with, but it’s what separates a professional looking finish from one that looks homemade.
If it’s your first curved project, practice the stapling sequence on a scrap piece first. The curve is manageable once you understand how the fabric needs to move.
— Dustin